Setting up automated emails
Choose which emails send themselves — booking confirmations, welcomes, reminders — and edit what each one says.
Some emails should go out without anyone pressing send: a confirmation the moment someone books, a welcome when they create an account, a reminder before a show. TheatreHQ's automations handle these for you. This guide shows where they live and how to make them sound like your society.
1. See your automations
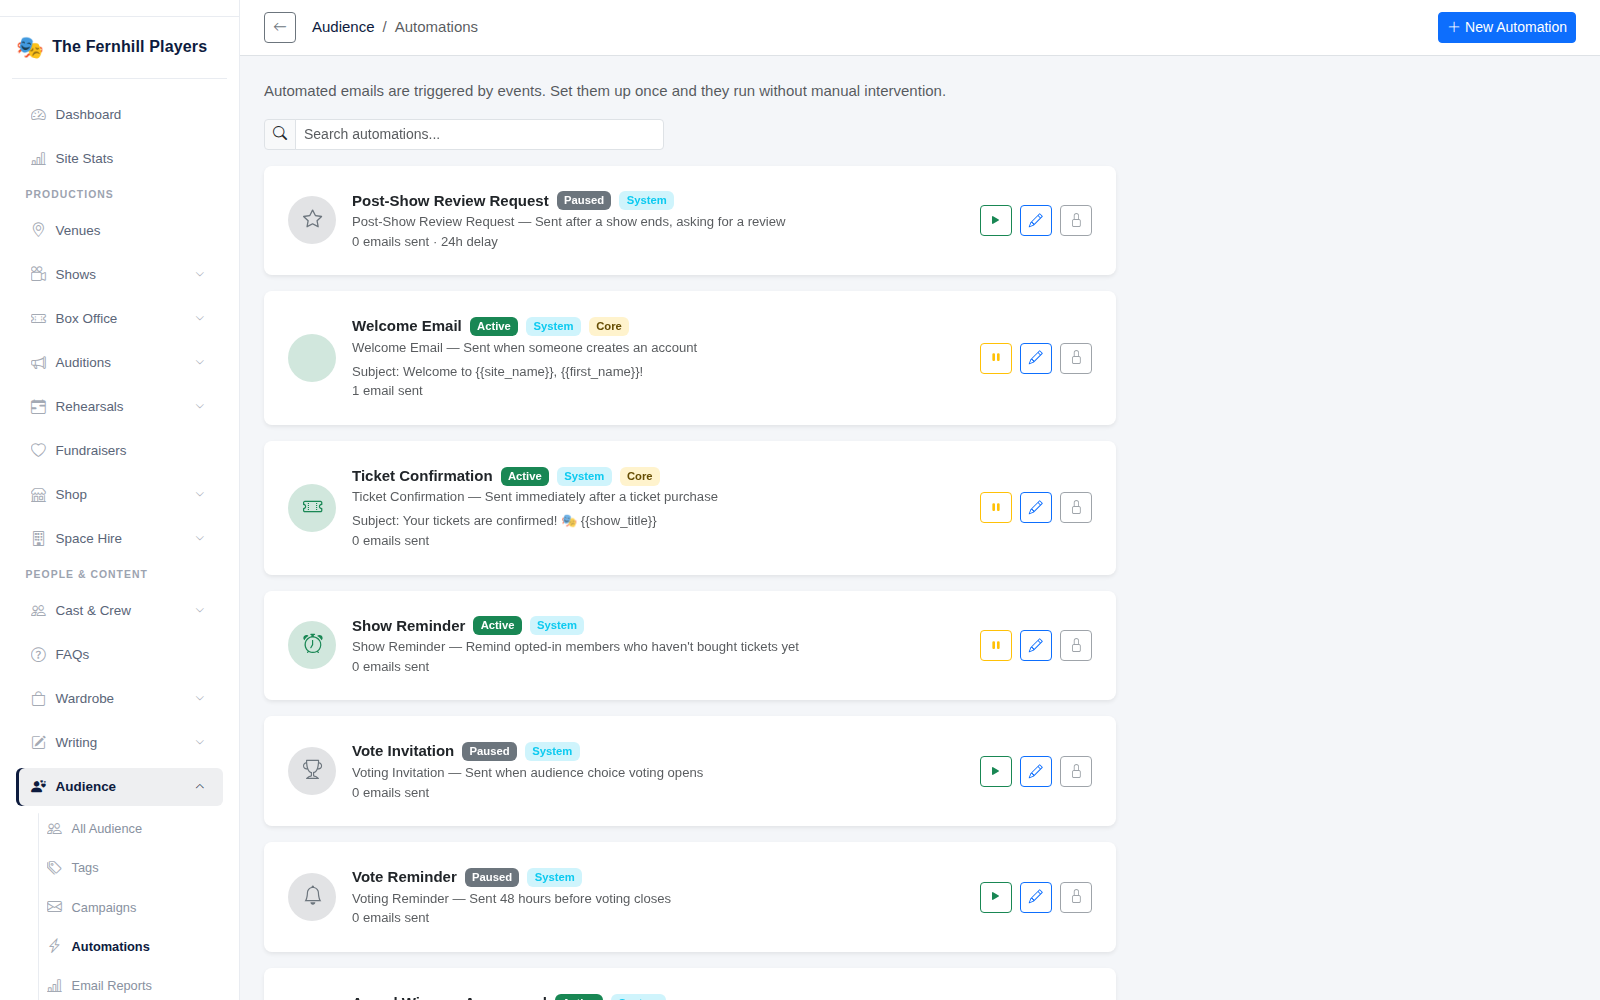
Go to Audience > Automations. Each automation is triggered by something happening — a ticket purchase, a new account, a show coming up — and shows whether it's Active or Paused, its subject line and how many emails it has sent. Ones marked Core, like Ticket Confirmation and Welcome Email, are the essentials your audience expects.
2. Open one to edit it
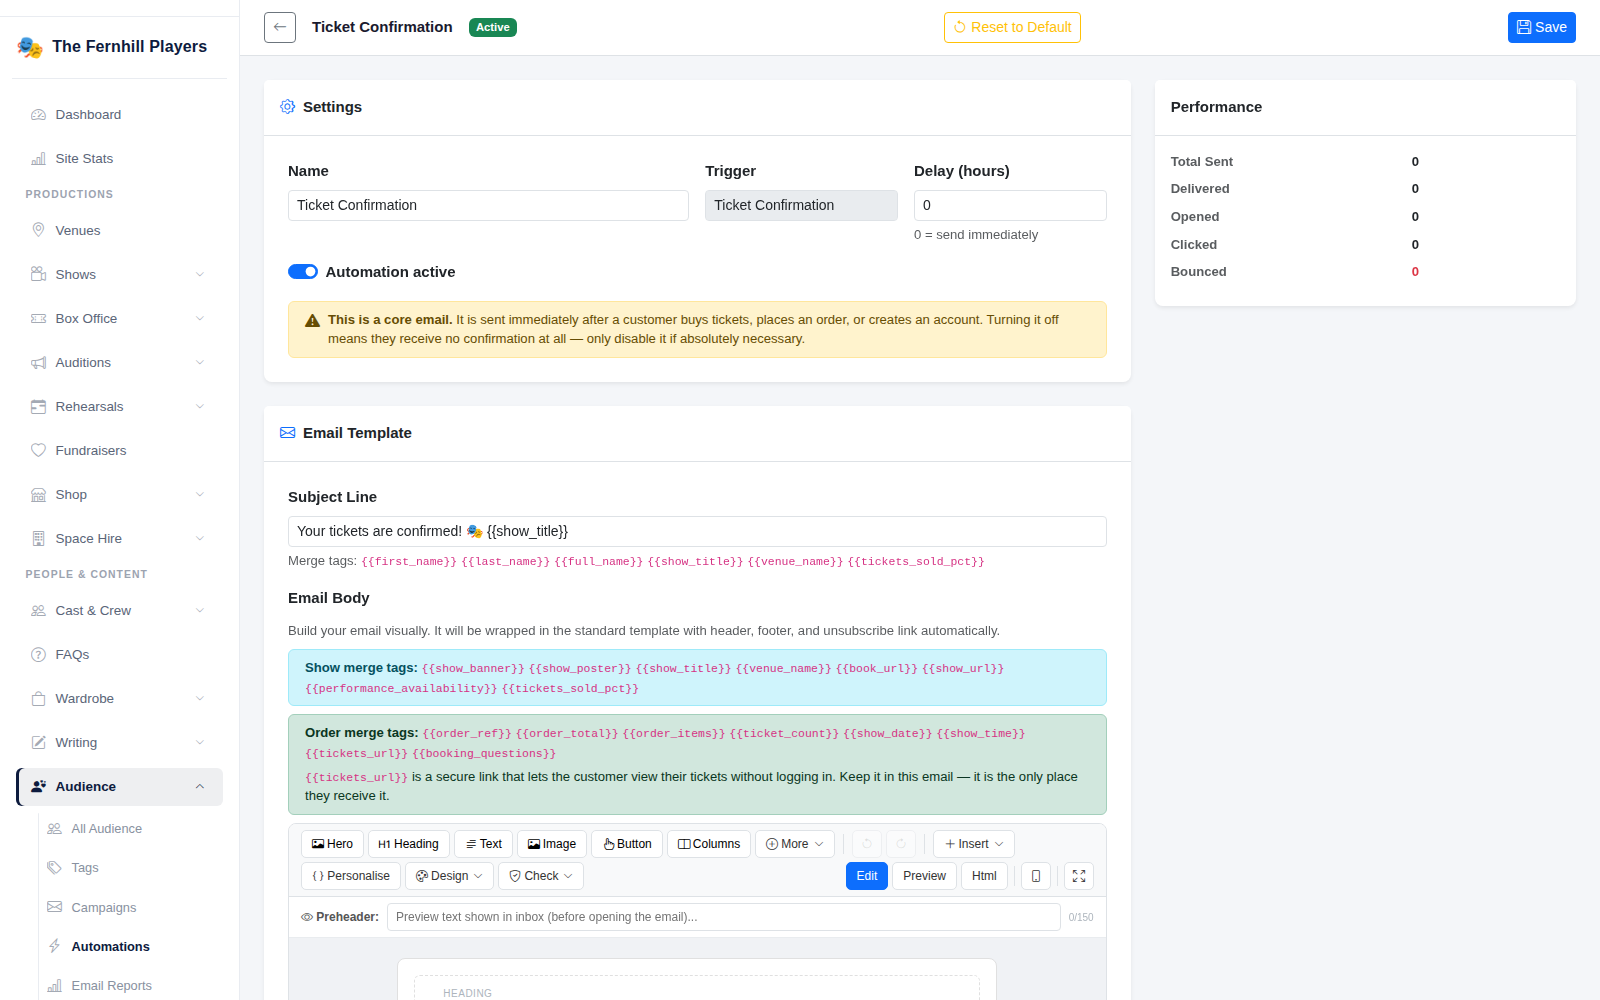
Click an automation to open it. Under Settings you can rename it, see its Trigger, set a Delay (hours) (0 sends immediately) and switch it on or off with Automation active. The Performance panel shows how many were sent, delivered, opened and clicked.
Core emails such as the ticket confirmation carry a warning: turning them off means customers get no confirmation at all, so leave those on.
3. Change the wording
Under Email Template, edit the Subject Line and build the Email Body in the visual editor with headings, text, images and buttons. It's wrapped in your standard header, footer and unsubscribe link automatically.
Merge tags fill in details for each person — for example {{first_name}}, {{show_title}} or, in order emails, {{order_ref}} and {{tickets_url}}, a secure link that lets the customer view their tickets without logging in. Use Preview to check how it looks, then click Save.
4. If you change your mind
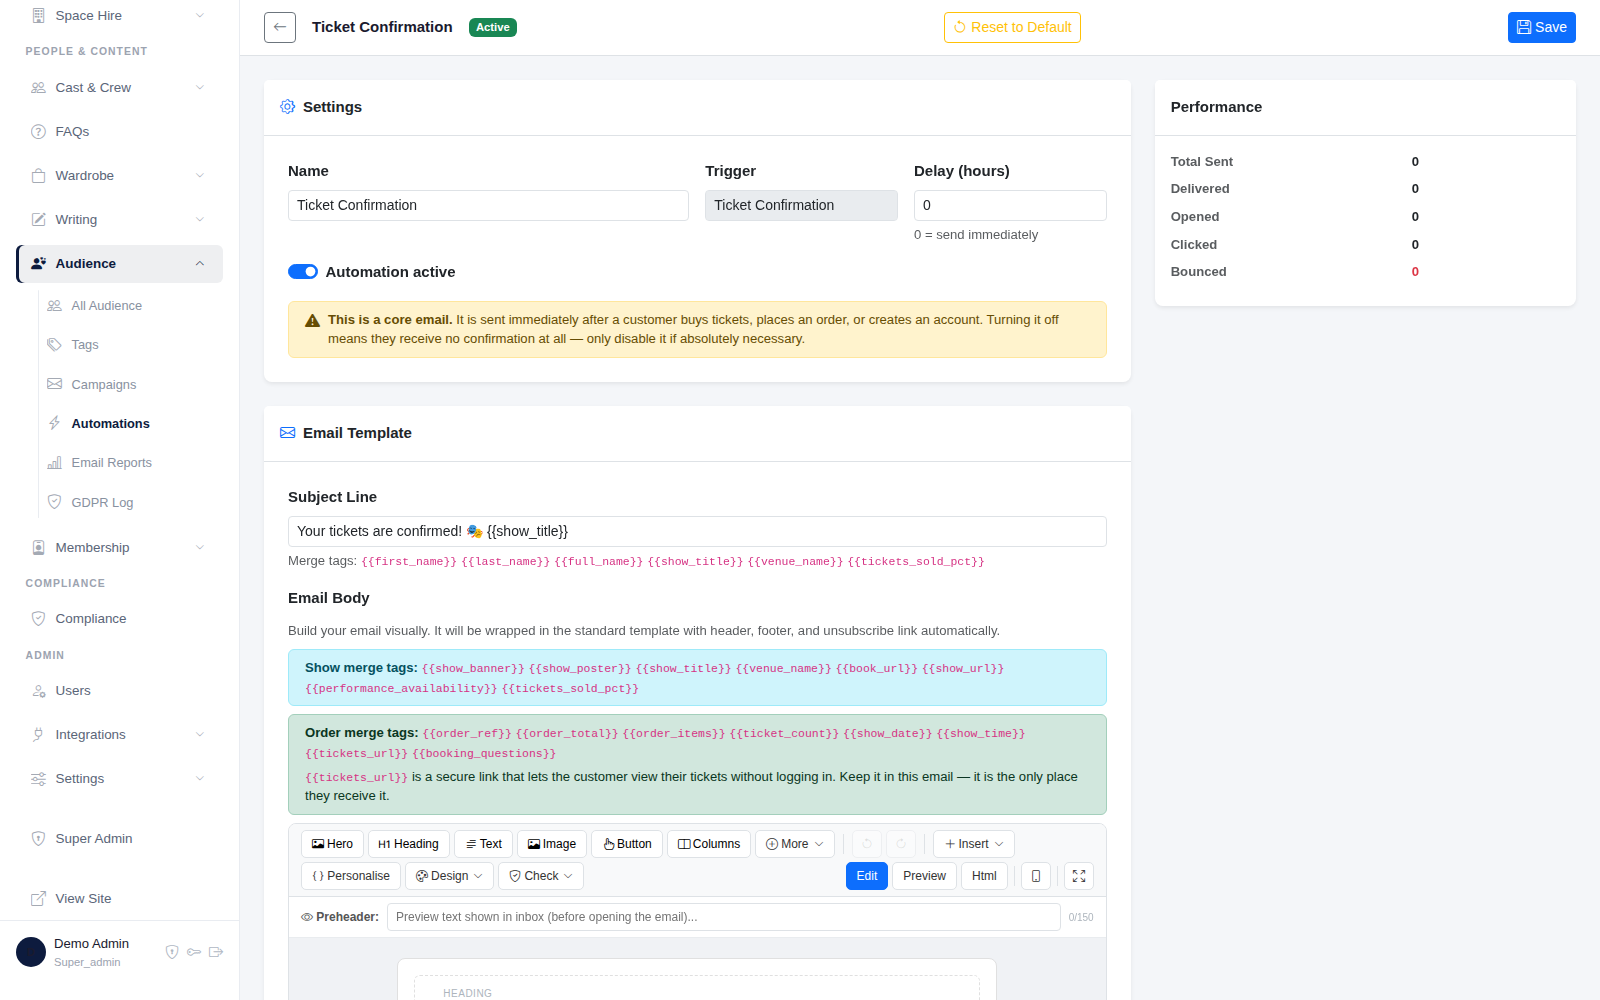
Reset to Default puts an automation back to TheatreHQ's original wording, so you can experiment safely.
Tip: automations are separate from email campaigns. Campaigns are newsletters you send when you choose; automations send themselves when something happens.