Setting up how your emails are sent
Choose how your site sends email — PHP mail, SMTP or Mailgun — set your sender name and address, and send a test.
Booking confirmations, tickets, reminders and newsletters all need to reach people's inboxes rather than their spam folders. Settings > Mail Settings controls how your site sends email. This guide explains the options.
1. Choose a sending method
Under Outgoing Mail Method, pick one — only one is active at a time:
- PHP mail() — works straight away with no setup, but messages are more likely to land in spam.
- SMTP — send through an email account you already have, such as Microsoft 365, Google Workspace or your web host's mail server.
- Mailgun — an email sending service with excellent deliverability and tracking, good for societies sending a lot of email.
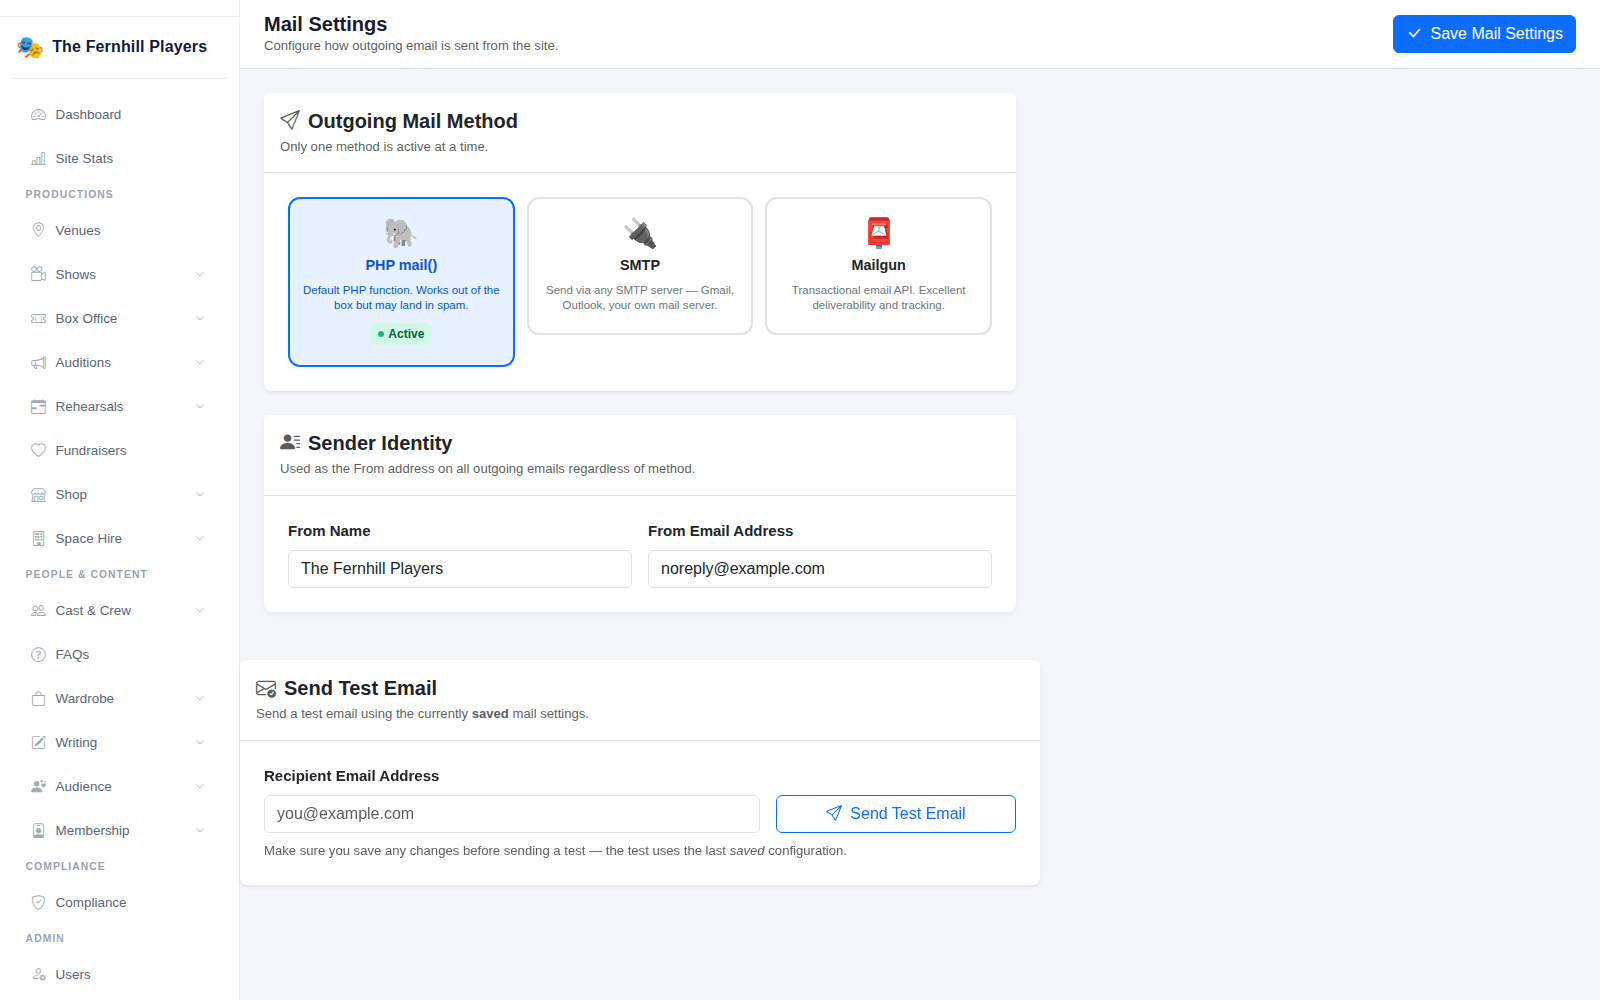
2. Fill in the details
For SMTP, enter the server details from your email provider — the host, port, encryption type, and the username and password for the account. For Mailgun, enter the details from your Mailgun account. Your provider's help pages list the settings to use.
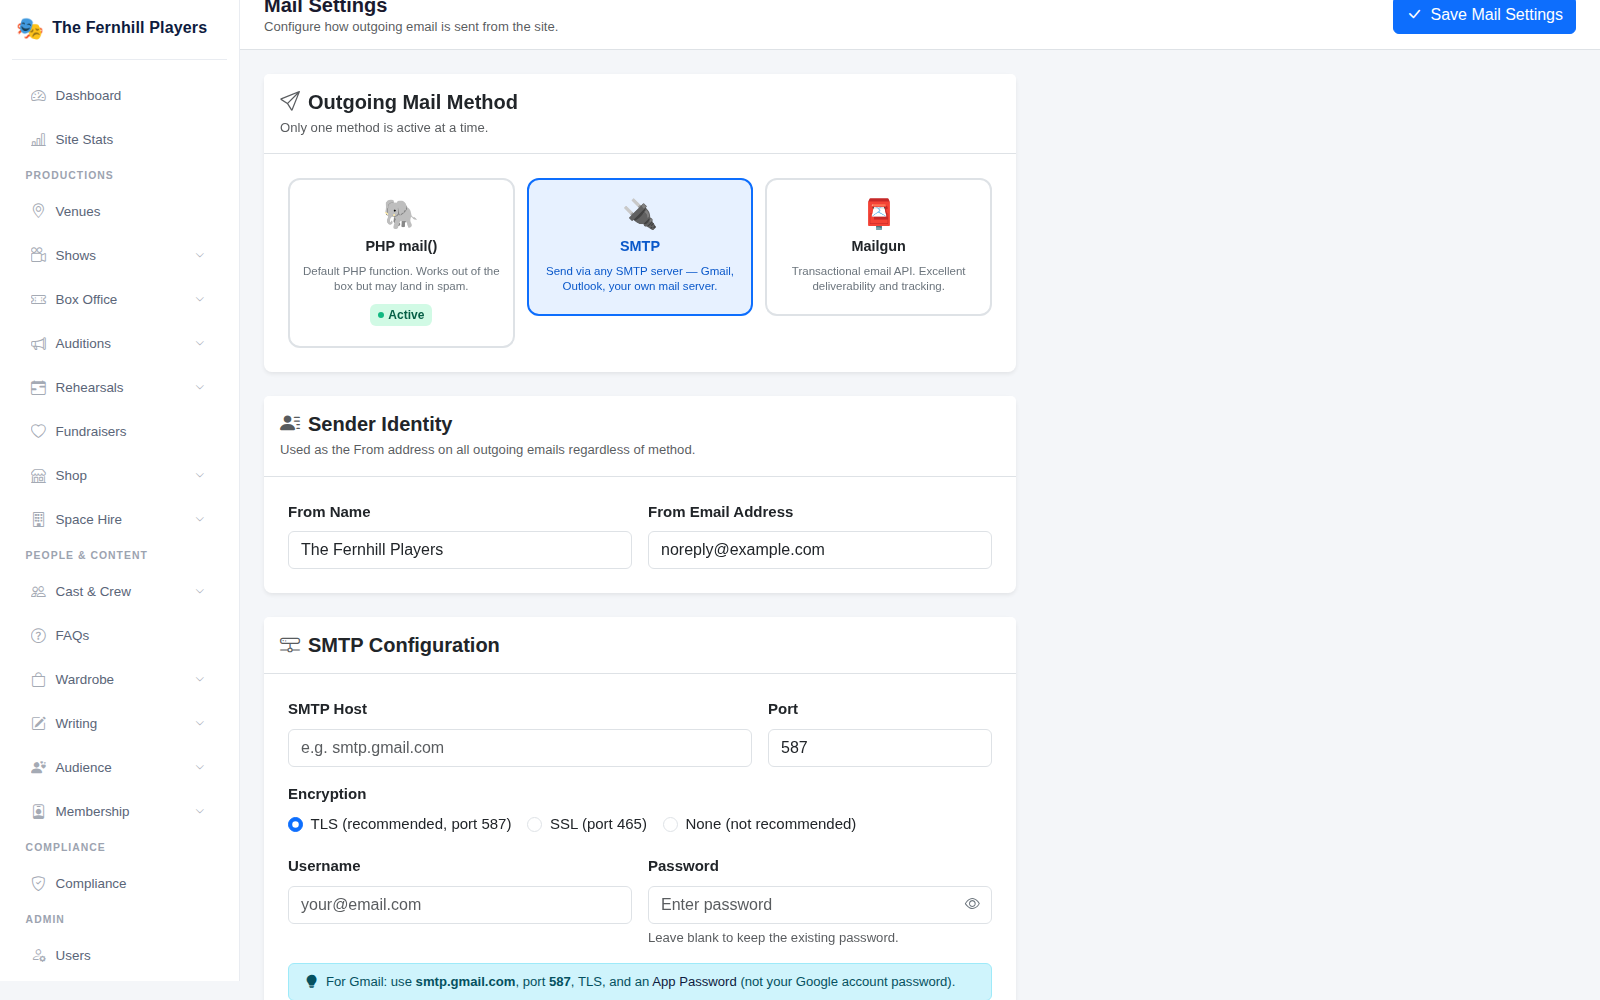
3. Set your sender identity
Under Sender Identity, set the From Name (usually your society's name) and the From Email Address. These are used on every email your site sends, whichever method you choose. Use an address on your own domain, such as boxoffice@, rather than a personal Gmail — it's more trustworthy and less likely to be marked as spam.
4. Save and send a test
Click Save Mail Settings, then enter your own address under Send Test Email and send one. The test uses the last saved settings, so save first. If it arrives, you're done; if it lands in spam or doesn't arrive, check the details with your email provider.
Tip: if you use your own domain for email, ask whoever manages it to set up its SPF and DKIM records for your sending service — it makes a big difference to whether emails reach inboxes.