Tagging your audience
Use tags like Volunteer, Press or VIP to group people in your audience list, then filter by them or send them their own emails.
Your audience list knows who has booked and what they've spent, but not who they are to your society. Tags fill that gap. Mark people as Volunteer, Press, Sponsor or School, and you can find them in seconds or send them an email of their own.
1. Create your tags
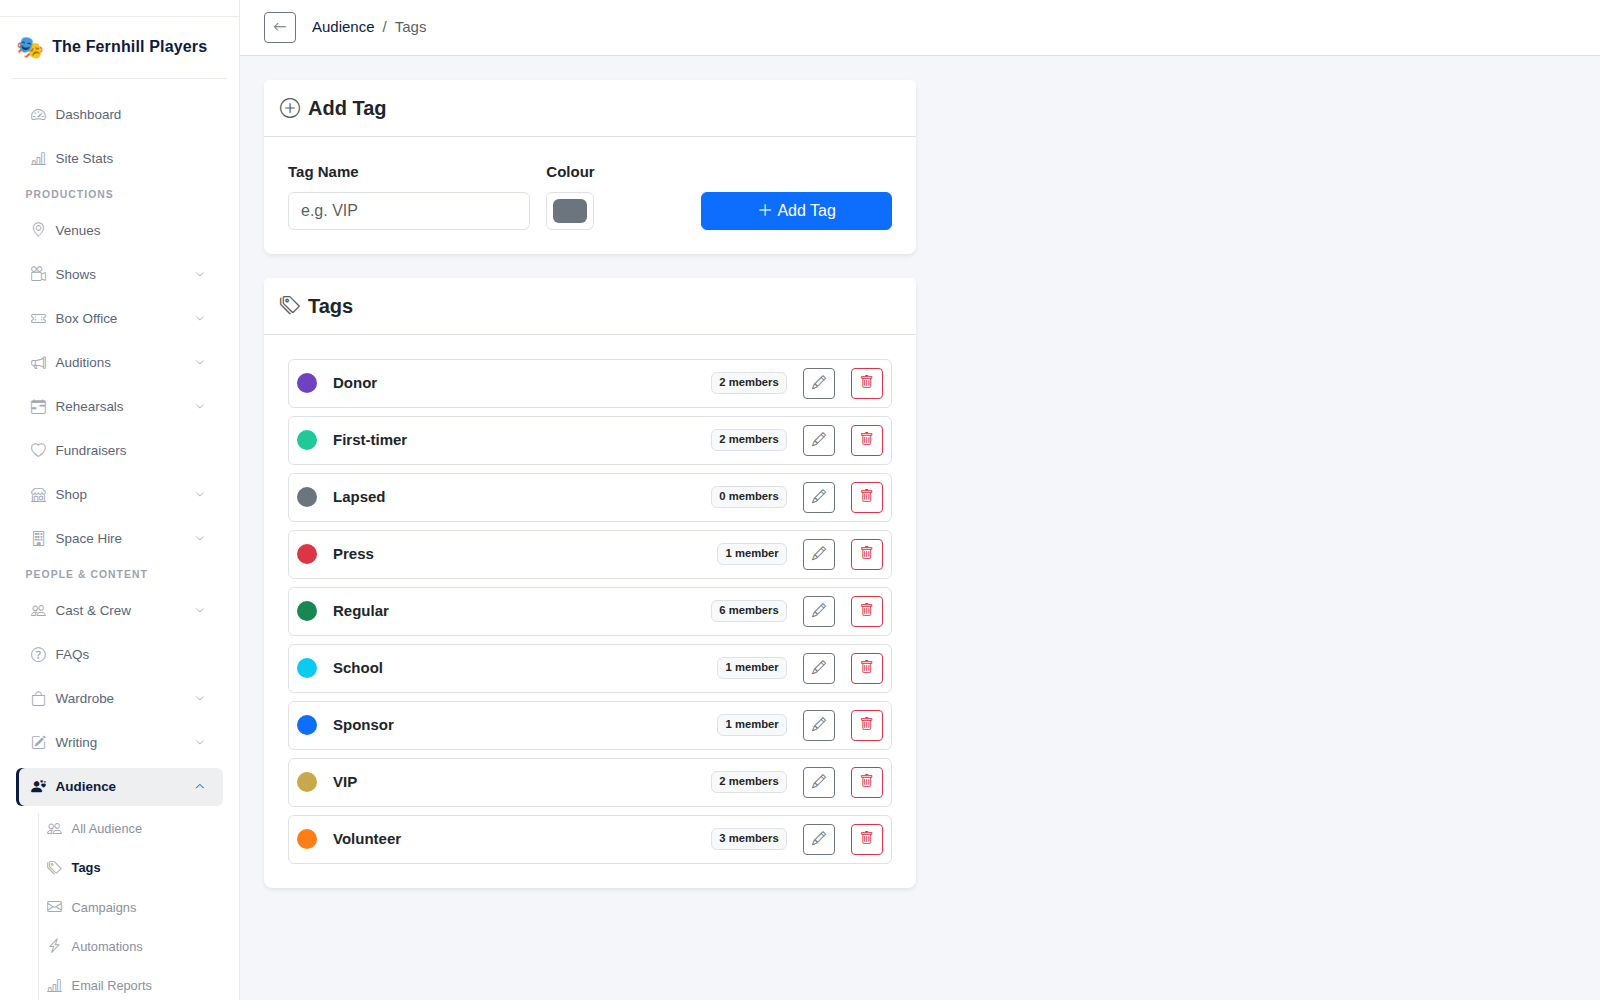
Go to Audience > Tags. Type a Tag Name, pick a Colour so it stands out in lists, and click Add Tag. Each tag shows how many people have it, and you can rename or delete it with the buttons beside it.
Keep the list short and clear. A handful of tags everyone understands is far more useful than dozens nobody remembers to use. Some that work well for most societies:
- Volunteer for front of house, bar and backstage helpers.
- Press for local journalists and reviewers.
- VIP and Donor for patrons, sponsors and people who give.
- School for teachers and youth groups who book in numbers.
- First-timer for people you'd like to welcome back.
2. Tag people
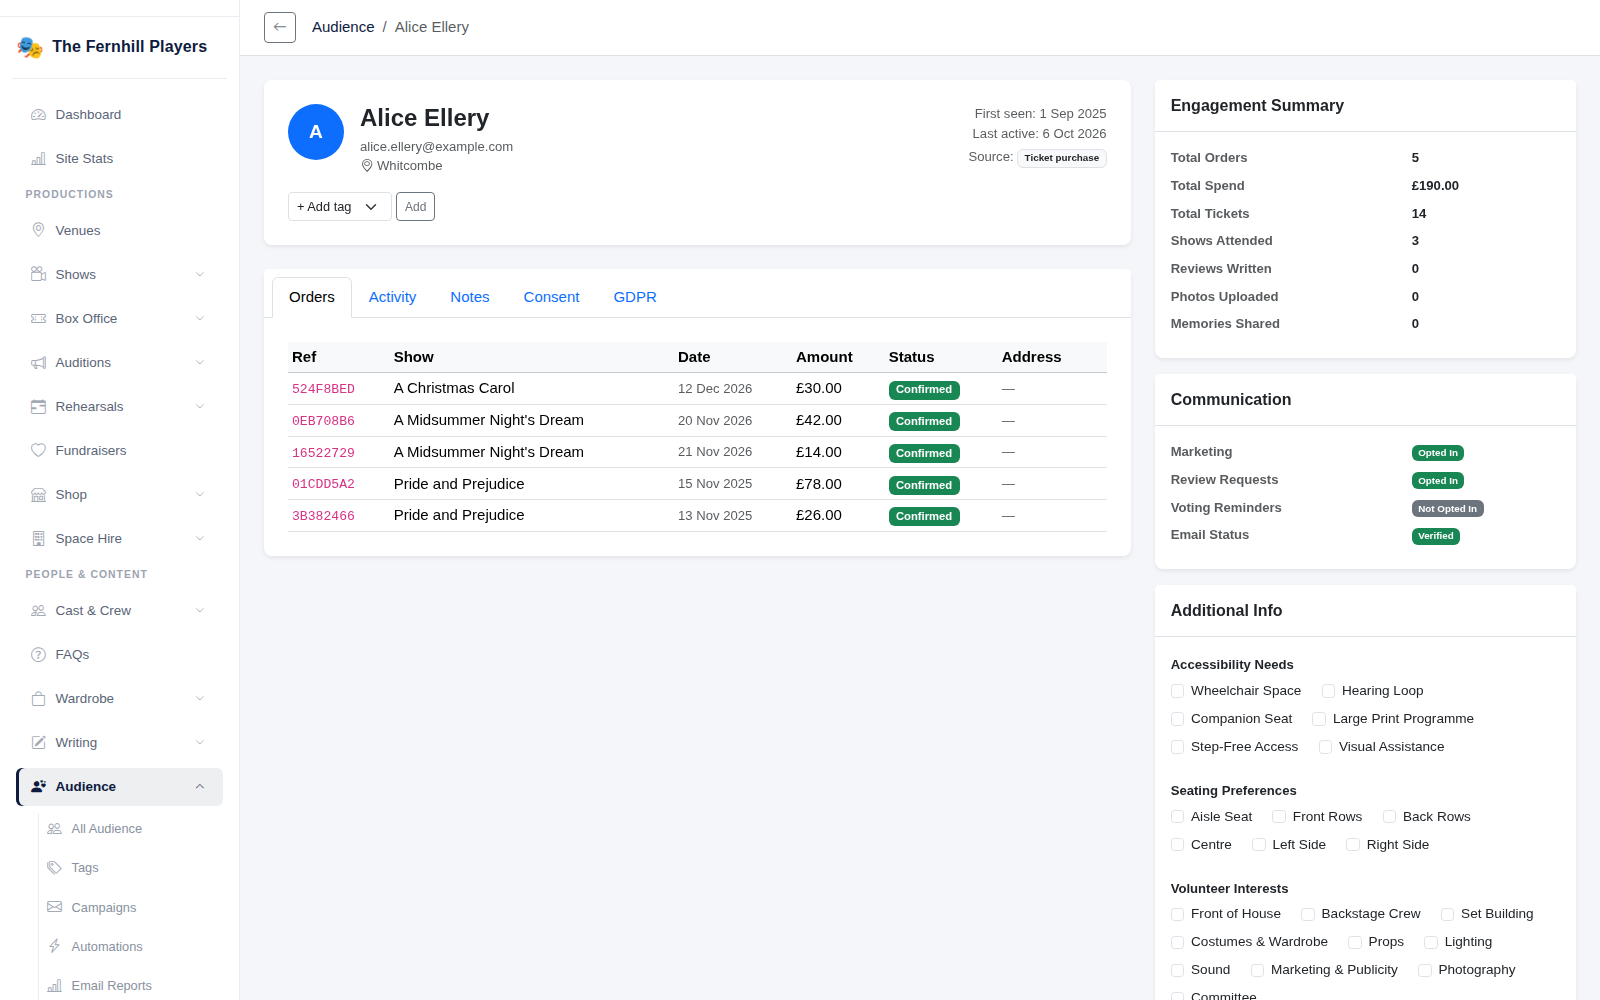
Open someone from Audience > All Audience. Next to their name, choose a tag from Add tag and click Add. Someone can have as many tags as you like, and you can remove one with the cross beside it.
Their profile also shows their bookings, their marketing preferences and notes, so it's a good place to check before you contact them.
3. Find people by tag
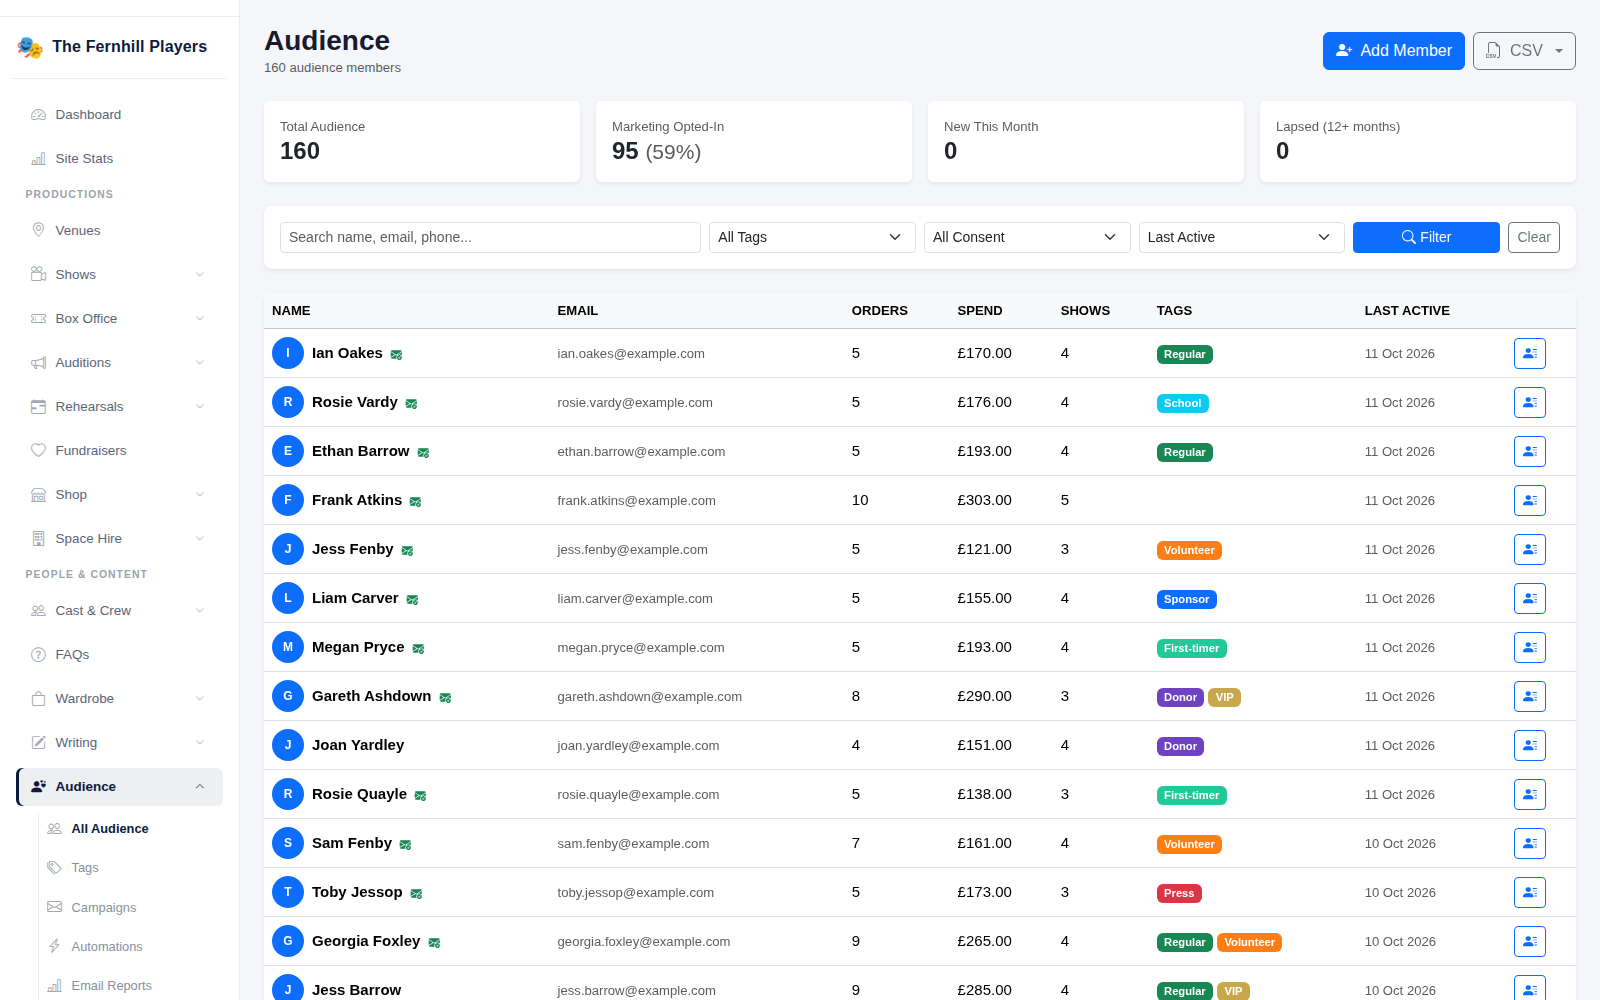
On All Audience, choose a tag from the All Tags menu and click Filter. You can combine it with the consent filter, for example to see only volunteers who've agreed to marketing emails. Tags also show in the list itself, so you can see them at a glance.
4. Email a tagged group
When you create an email campaign, you can pick a Tag to send it only to people with that tag. That's ideal for a volunteer rota call, a press night invitation or a thank you to your donors. See Sending an email campaign for the rest.
Tip: tags are for organising people, not permission to email them. Marketing emails still only go to people who've opted in.