Adding a show
This walkthrough shows how to find, edit, promote, and add productions in TheatreHQ. You'll see where shows live, how to update key details, set performances, send announcements, tag people and photos, and create a new show.
This walkthrough shows how to find, edit, promote, and add productions in TheatreHQ. You'll see where shows live, how to update key details, set performances, send announcements, tag people and photos, and create a new show.
1. Find Shows in the sidebar
After you log in, open the Shows section from the left-hand sidebar. Expanding Shows gives you quick access to All Shows, Awards, and Custom Fields, so your production admin stays in one place. Use All Shows to see every production currently in TheatreHQ.
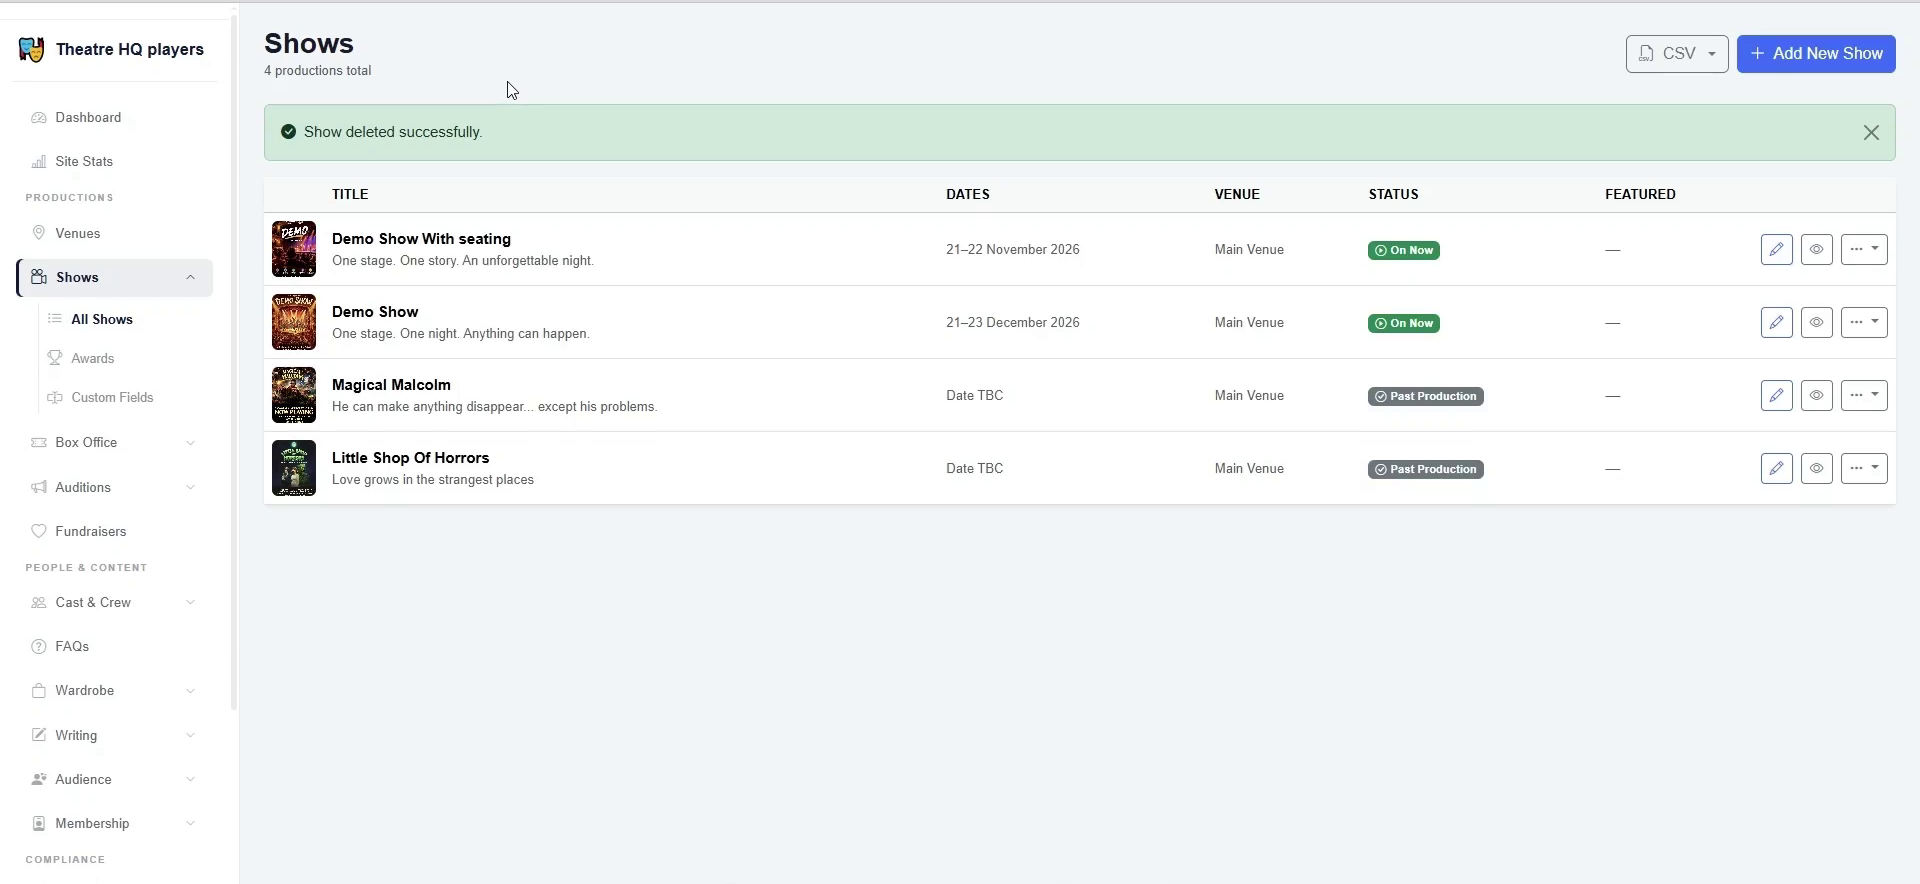
2. Browse the All Shows list
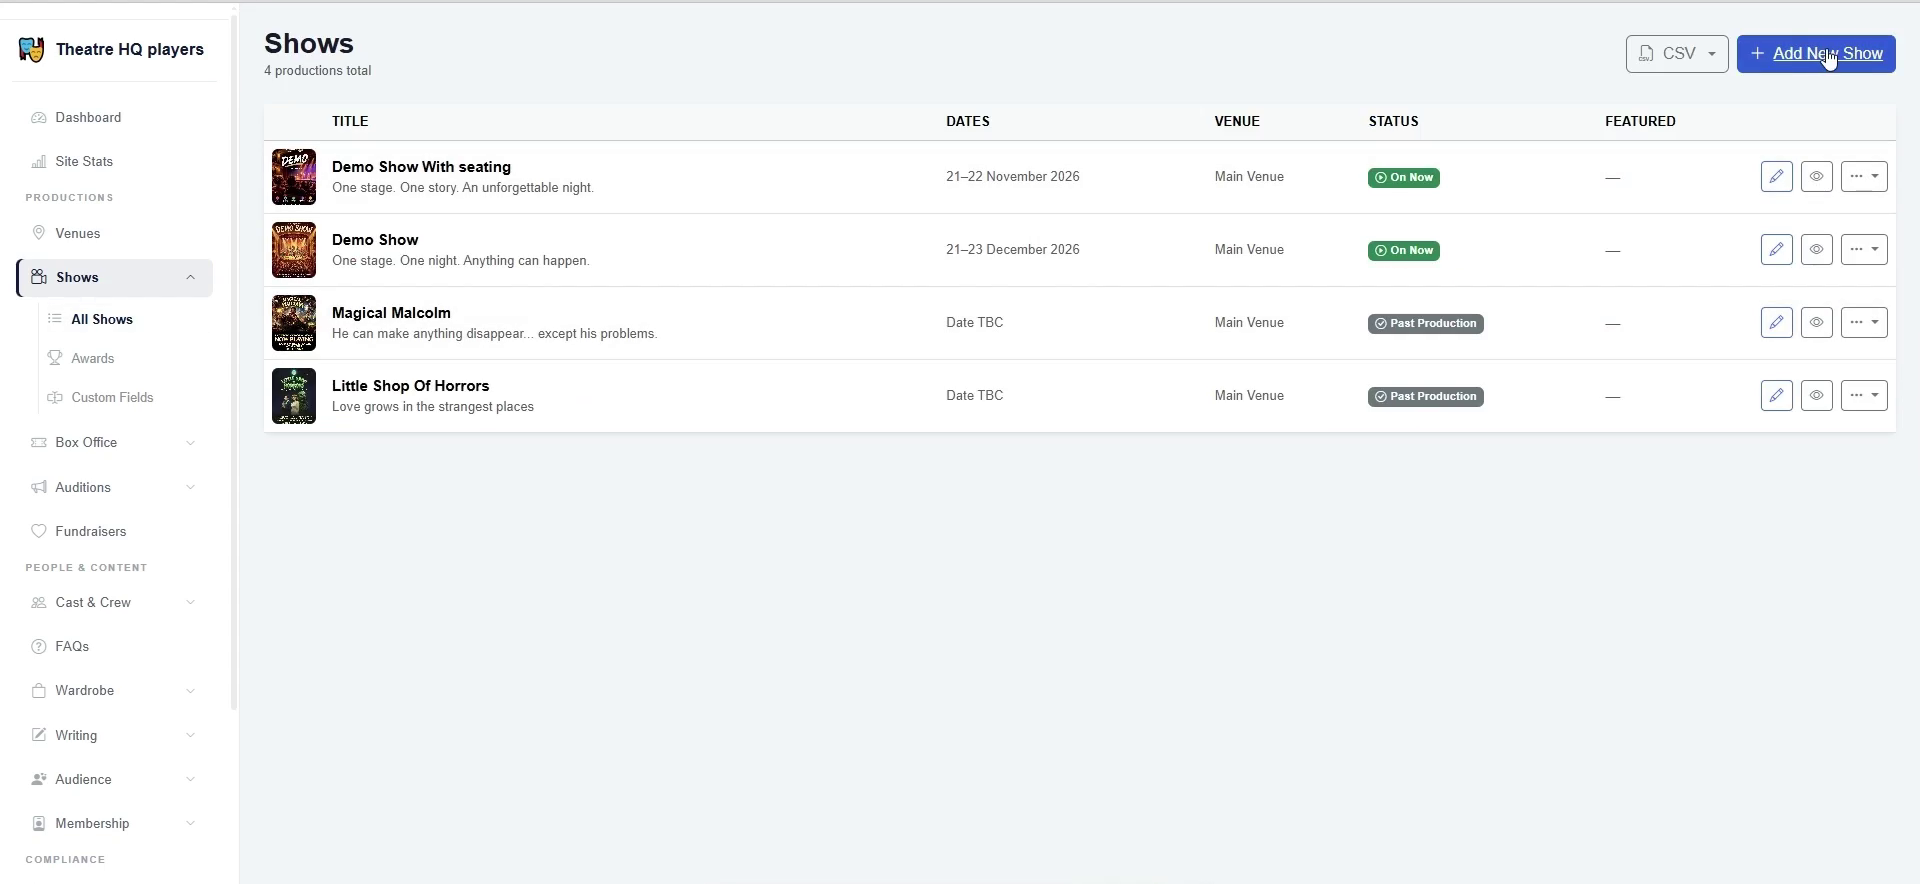
The All Shows screen gives you a single list of every production, including dates, venue, status, and featured state. From here you can quickly spot current and past productions, open a show for editing, or preview what audiences will see. It's the fastest way to keep an eye on your full season.
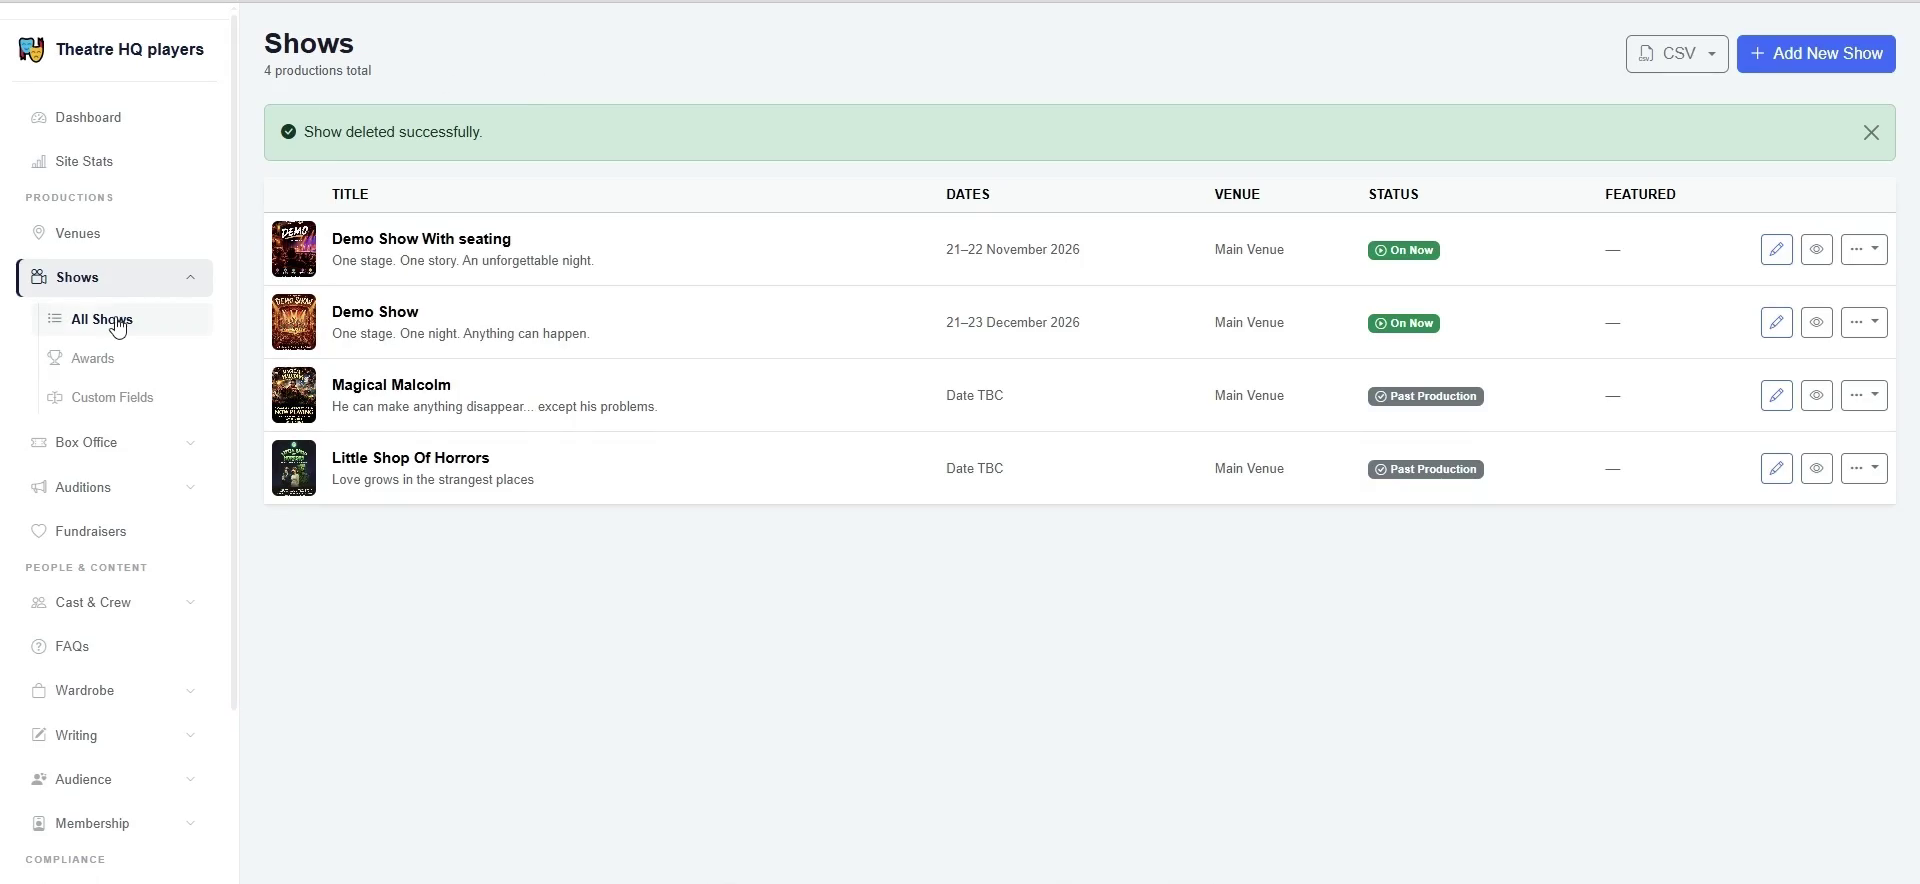
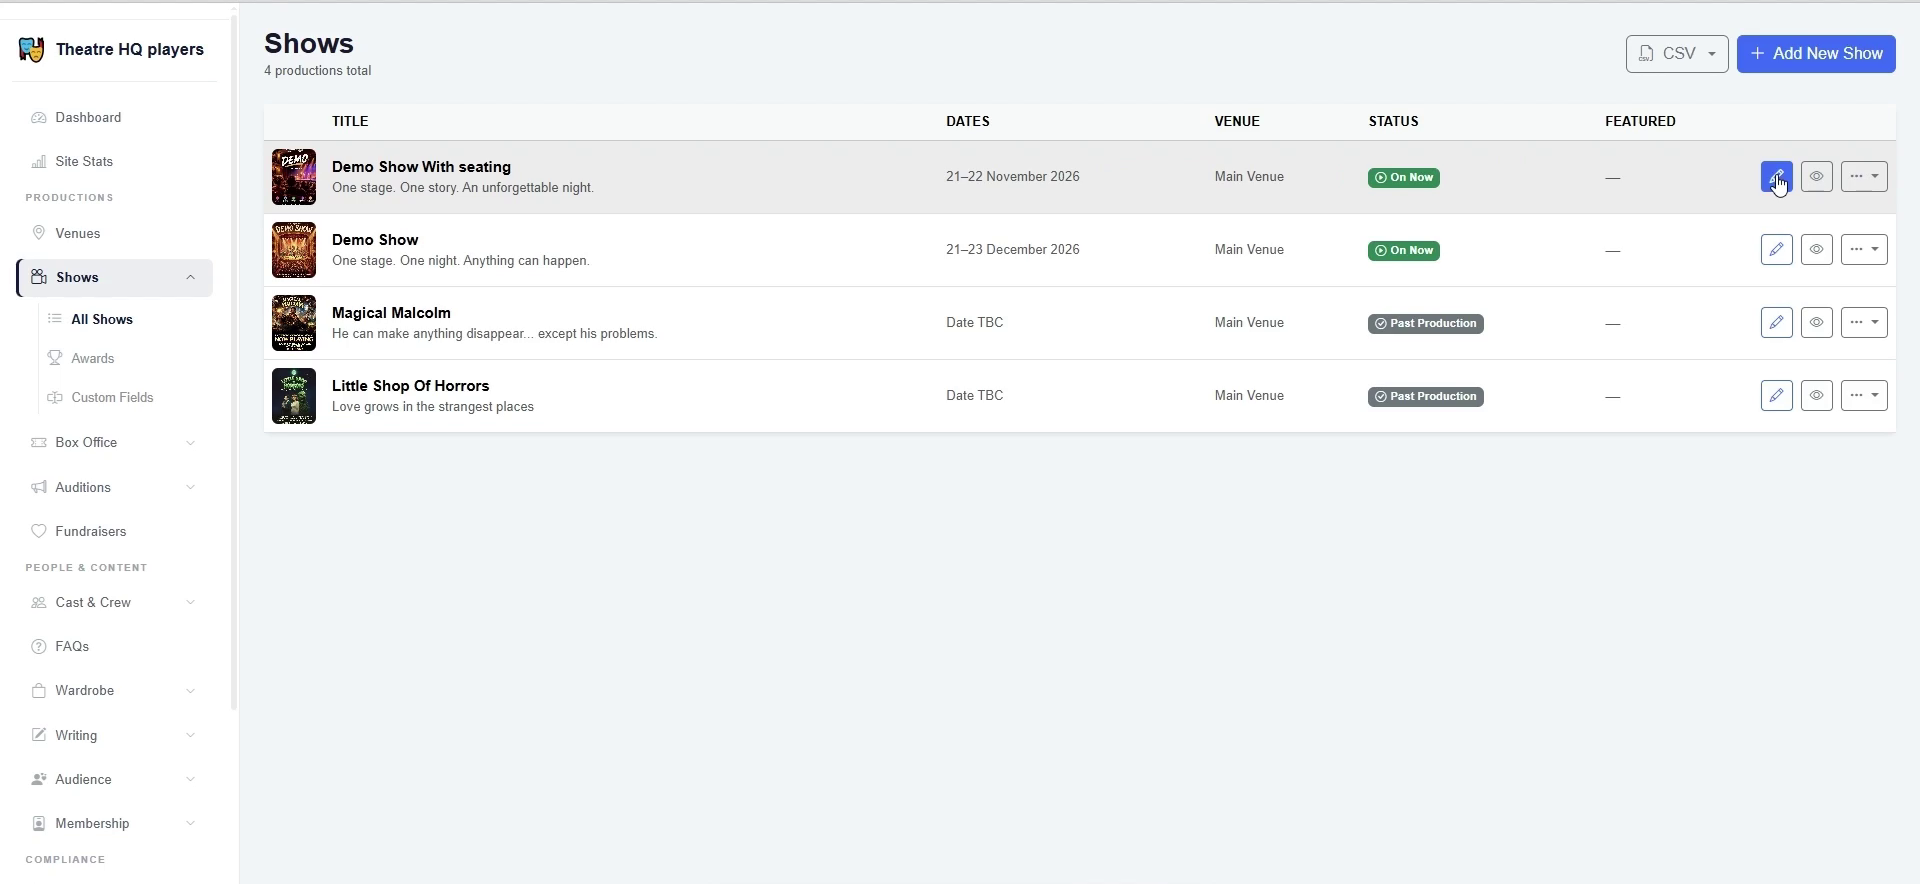
3. Edit a show with the pencil icon
To update a production, find its row and click the pencil icon on the right. That opens the show page where you can change public-facing details and manage the production setup. Keeping show info current helps your website, box office, and audience communications stay in sync.
4. Update title, tagline, genre, and description
The show page brings together the core content fields: title, URL slug, tagline, genre, and description. These are the details audiences see when they browse your season, so it's easy to refine the wording without touching code. You can also use the description field to give search engines and visitors a clear summary of the production.
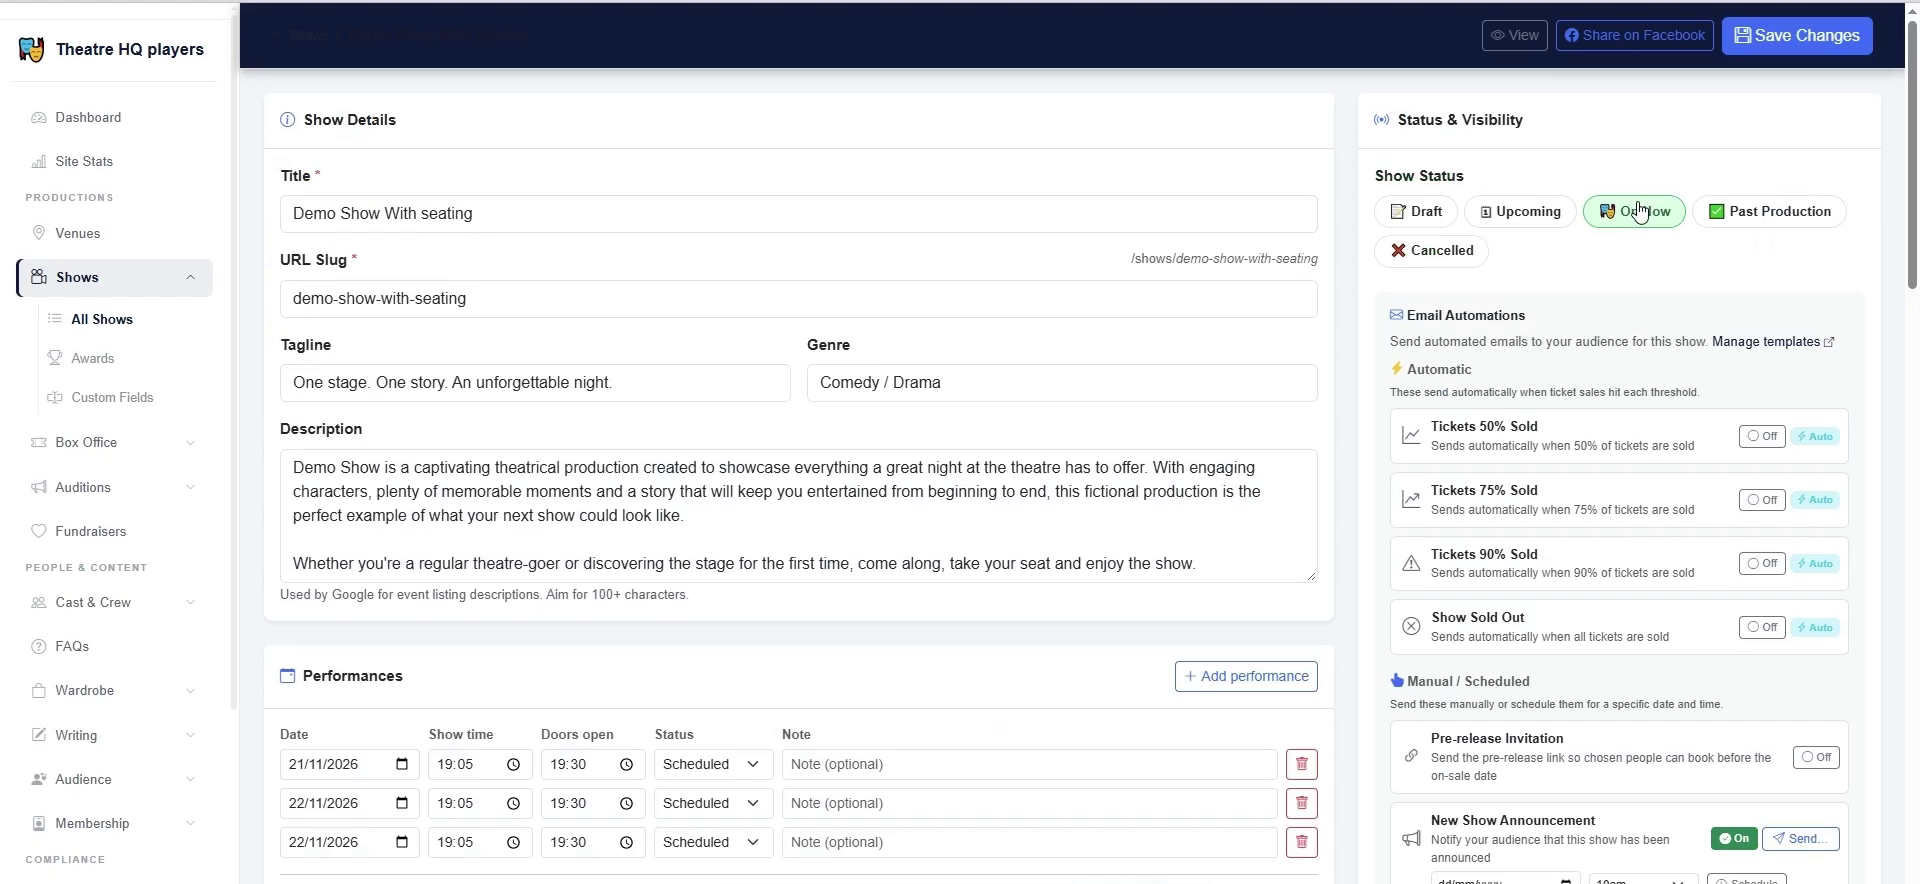
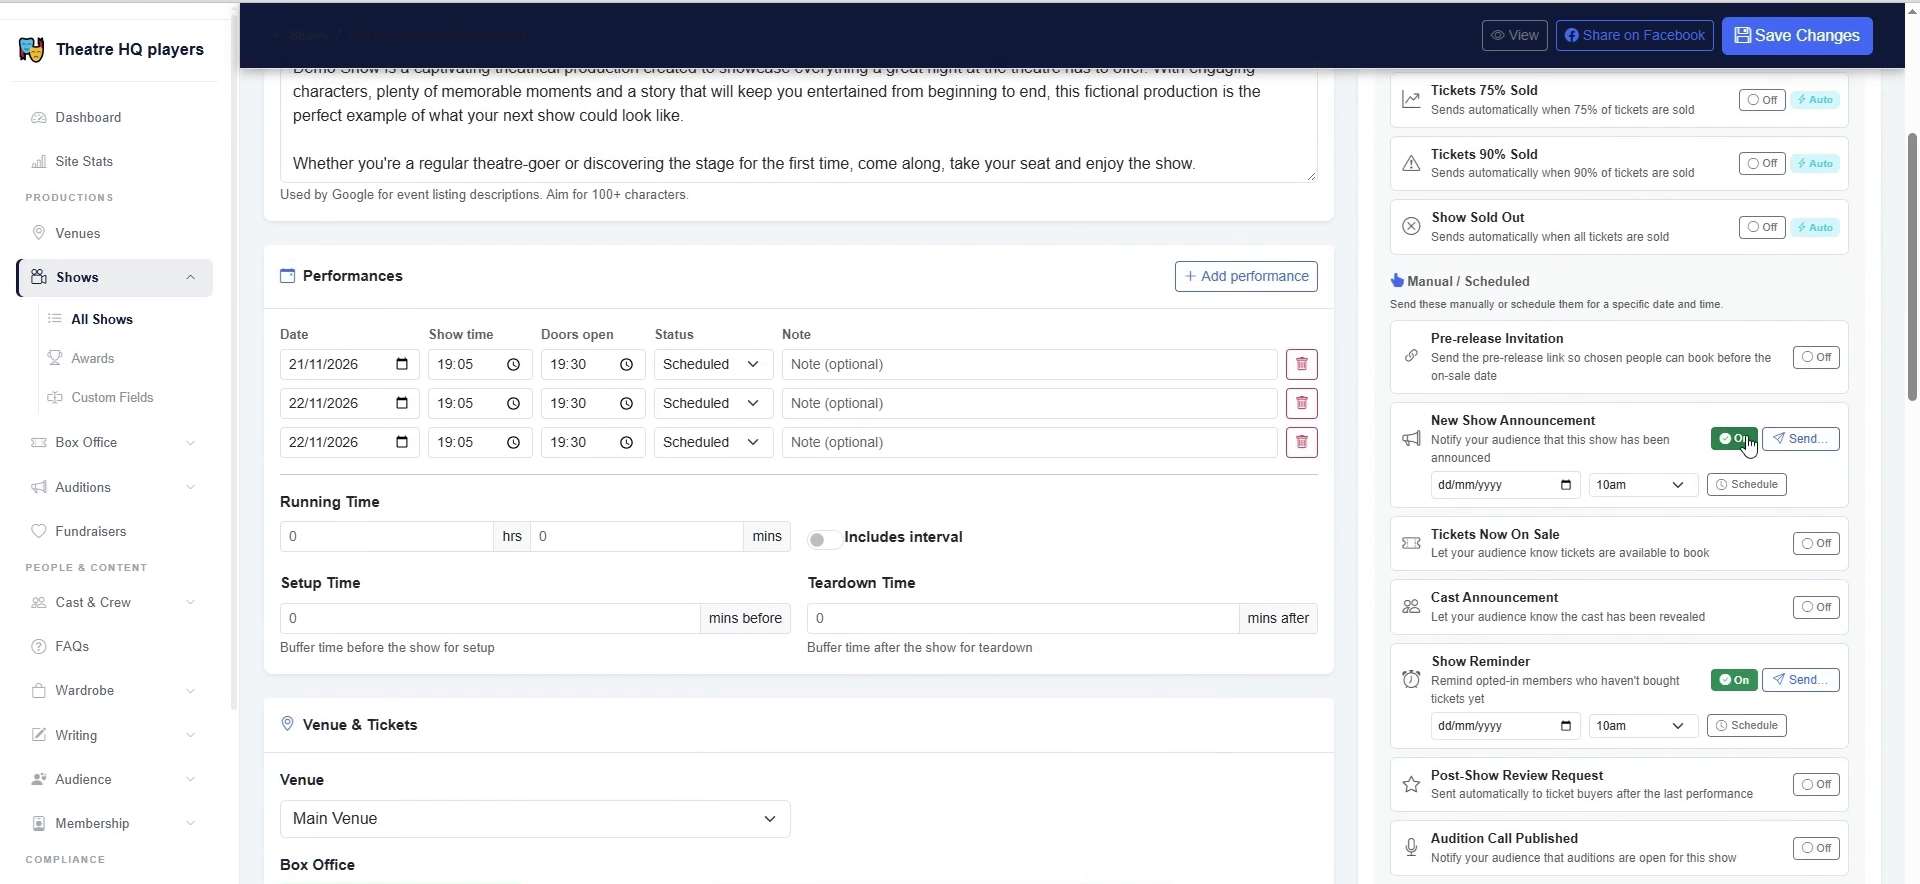
5. Set up performances and timings
In the Performances section you can add each date, show time, doors-open time, status, and note. This is where you build the schedule that powers ticketing, reminders, and audience information. Use Add performance to build out a run, then adjust running time, setup, and teardown as needed.
6. Preview and send show announcements
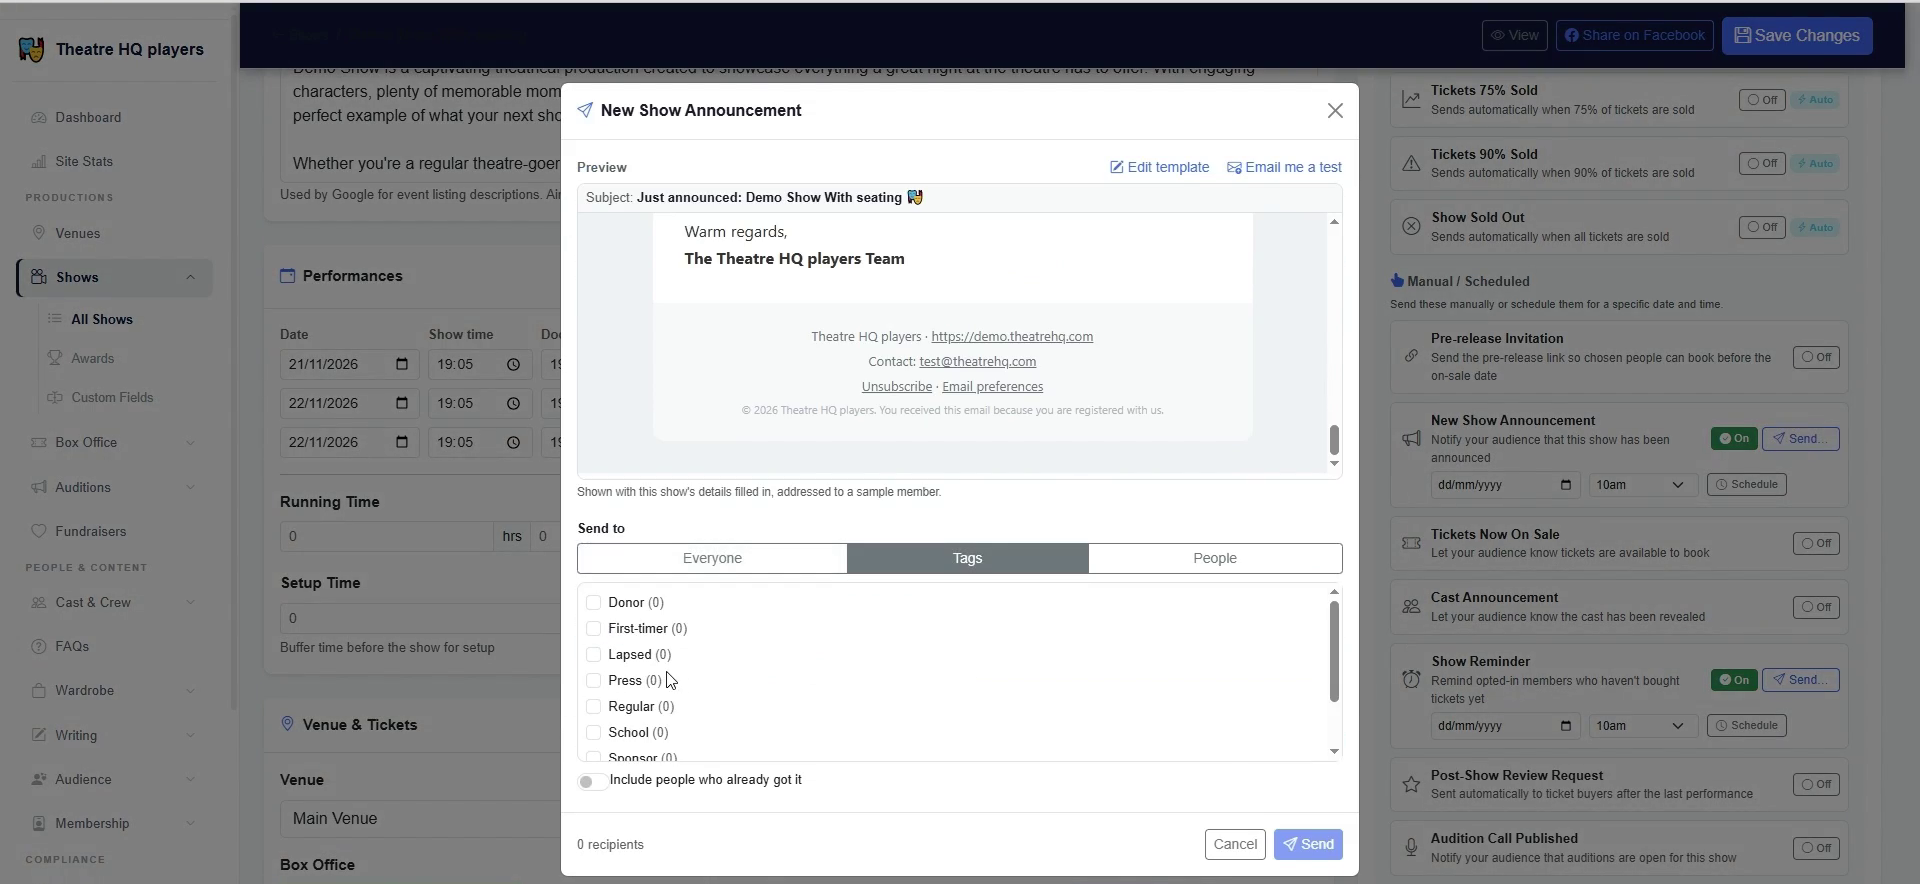
The New Show Announcement email lets you preview the message before it goes out, so you can check the subject, branding, and show details. From the Send to tabs, choose Everyone, Tags for CRM segments, or People to paste specific email addresses. This keeps opening-night news targeted and on-brand.
7. Tag cast and crew, and add photos
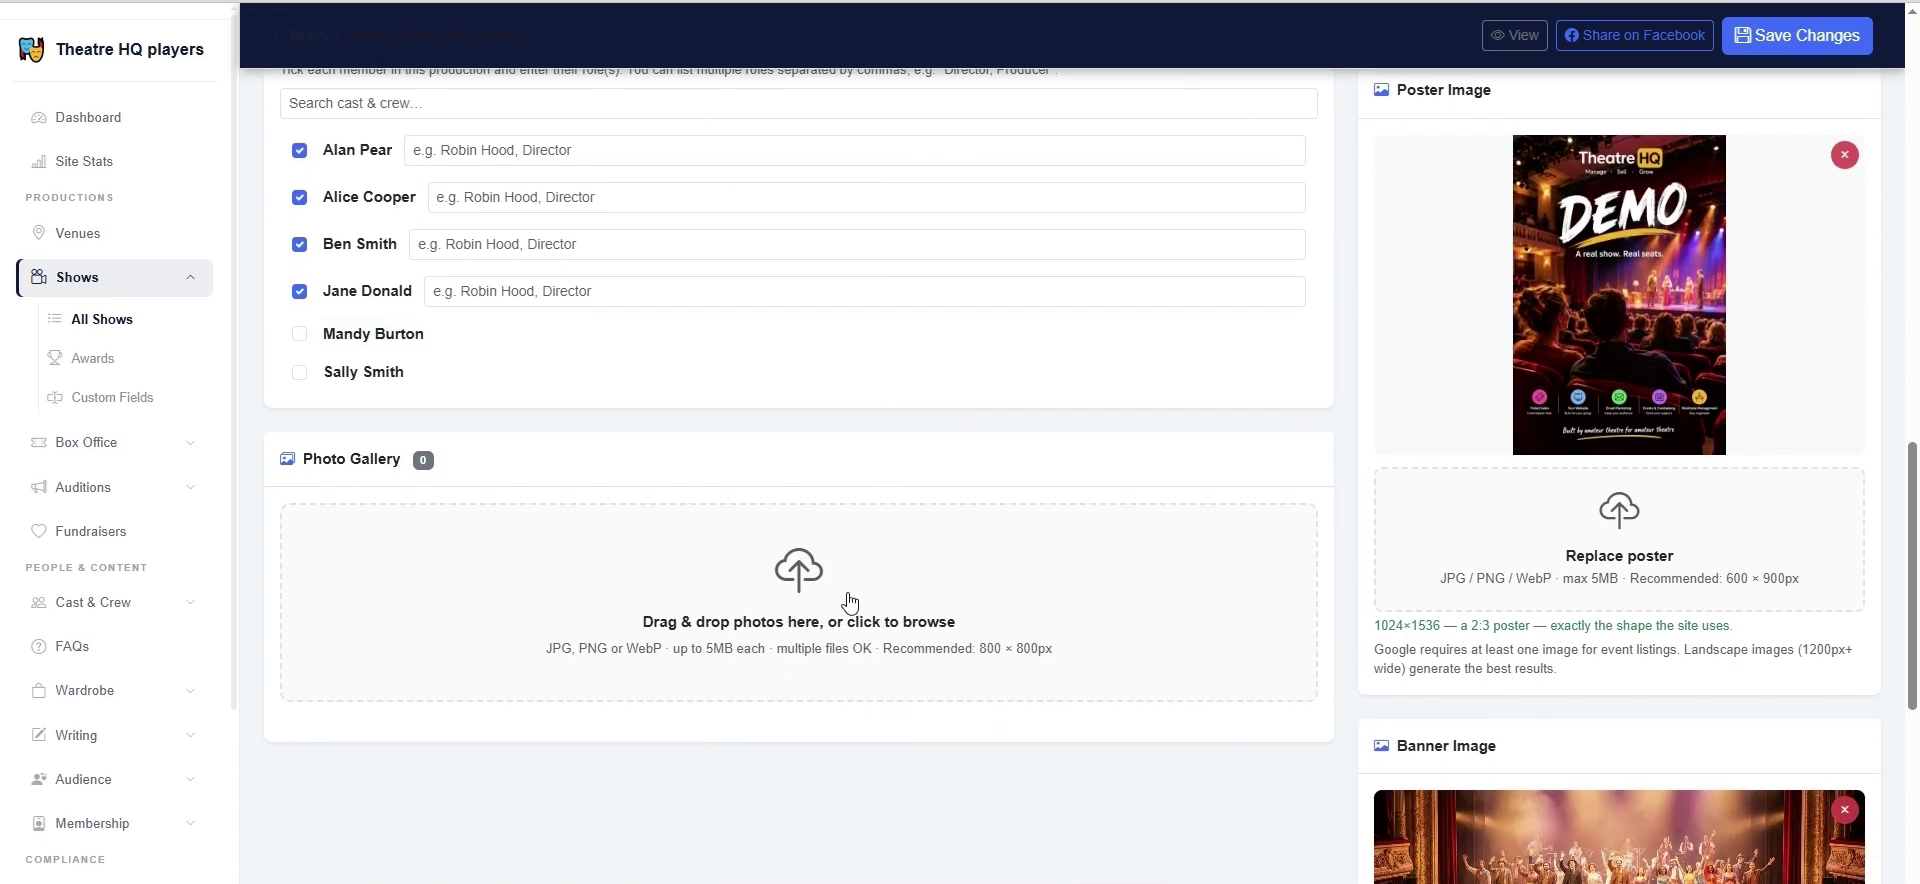
In Cast & Crew, tick the people involved and type their roles, such as Director or Producer, to keep credits and contact context together. Below that, the Photo Gallery accepts JPG, PNG, or WebP images so you can build a visual record of the production. Tagging people and uploading photos makes it easier to reuse assets for promotion and archives.
8. Add a new show from the top-right button
When you're ready to add another production, go back to All Shows and click Add New Show in the top-right corner. You'll get the same show form, with fields for details, performances, people, and media. That makes it straightforward to set up a new production without leaving the Shows area.
With these steps, TheatreHQ gives you one place to manage show details, performances, announcements, credits, and photos. Keep your shows up to date, and your team and audiences will always have the right information.