How to setup a box office
This guide shows how to configure a box office checkout for a show in TheatreHQ. It covers adding performances, choosing a box office mode, setting pricing and ticket types, and testing the public booking flow.
This guide shows how to configure a box office checkout for a show in TheatreHQ. It covers adding performances, choosing a box office mode, setting pricing and ticket types, and testing the public booking flow.
1. Add performances to your show
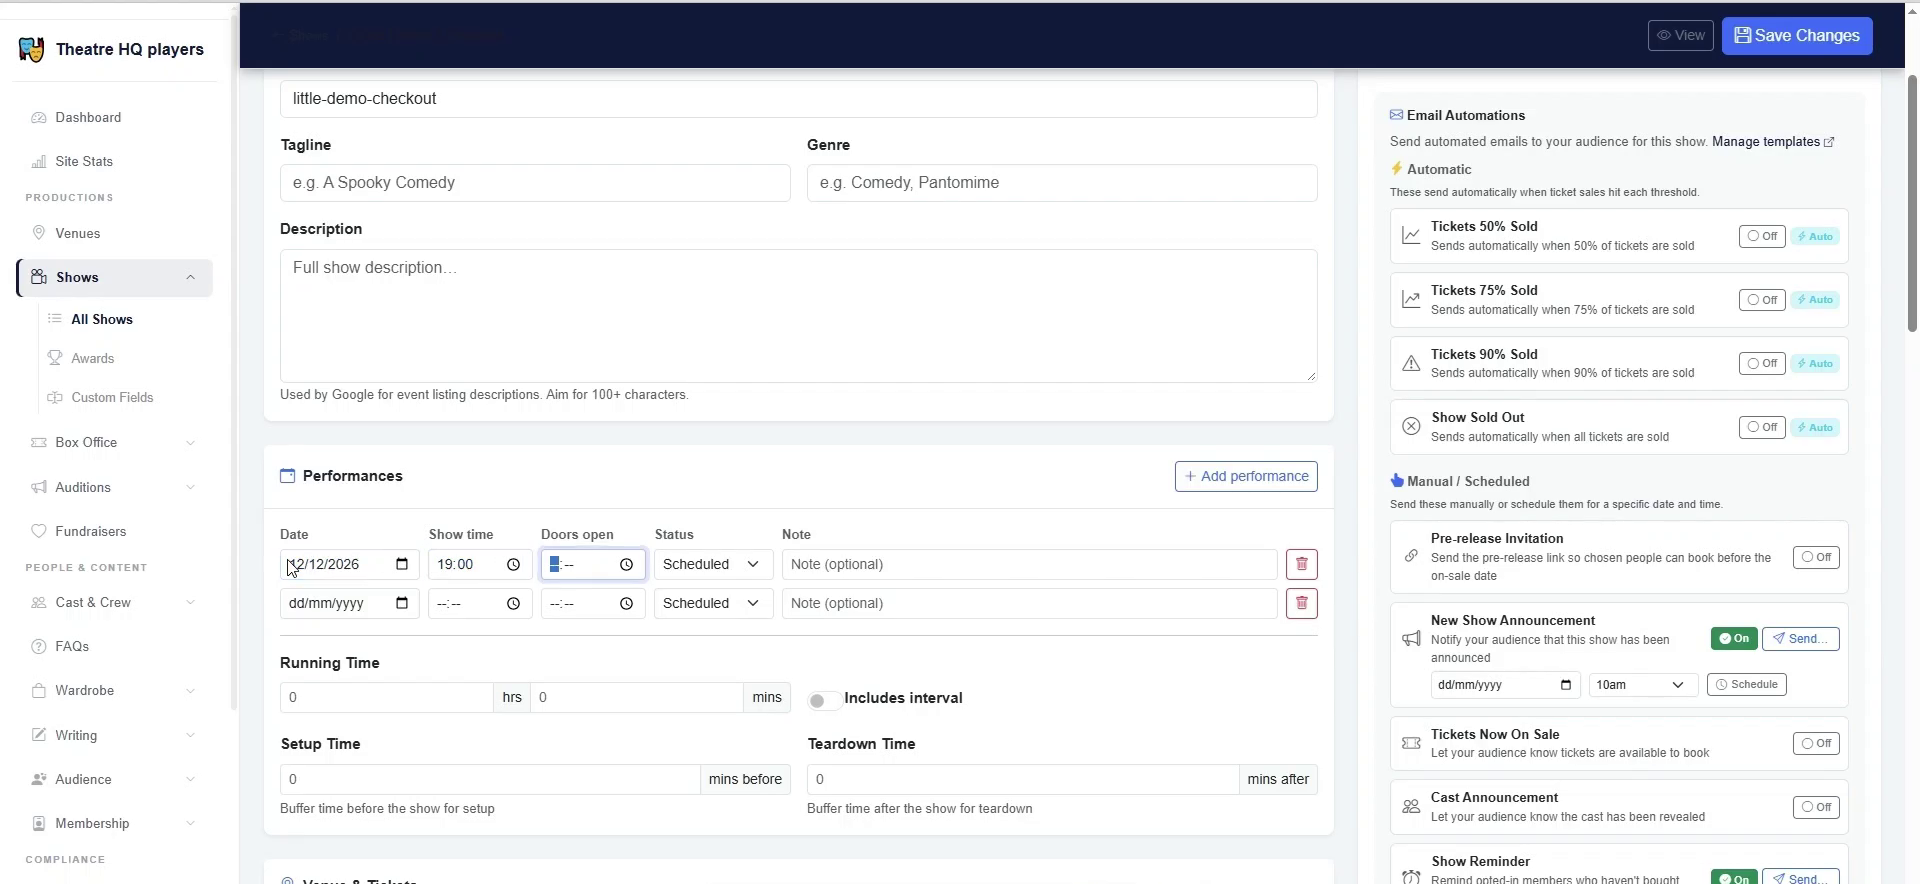
Open the show and scroll to Performances. Click Add performance to enter each date and time; you need at least one performance before Box Office Setup can be configured. Save the show once your performances are added.
2. Open Box Office Setup
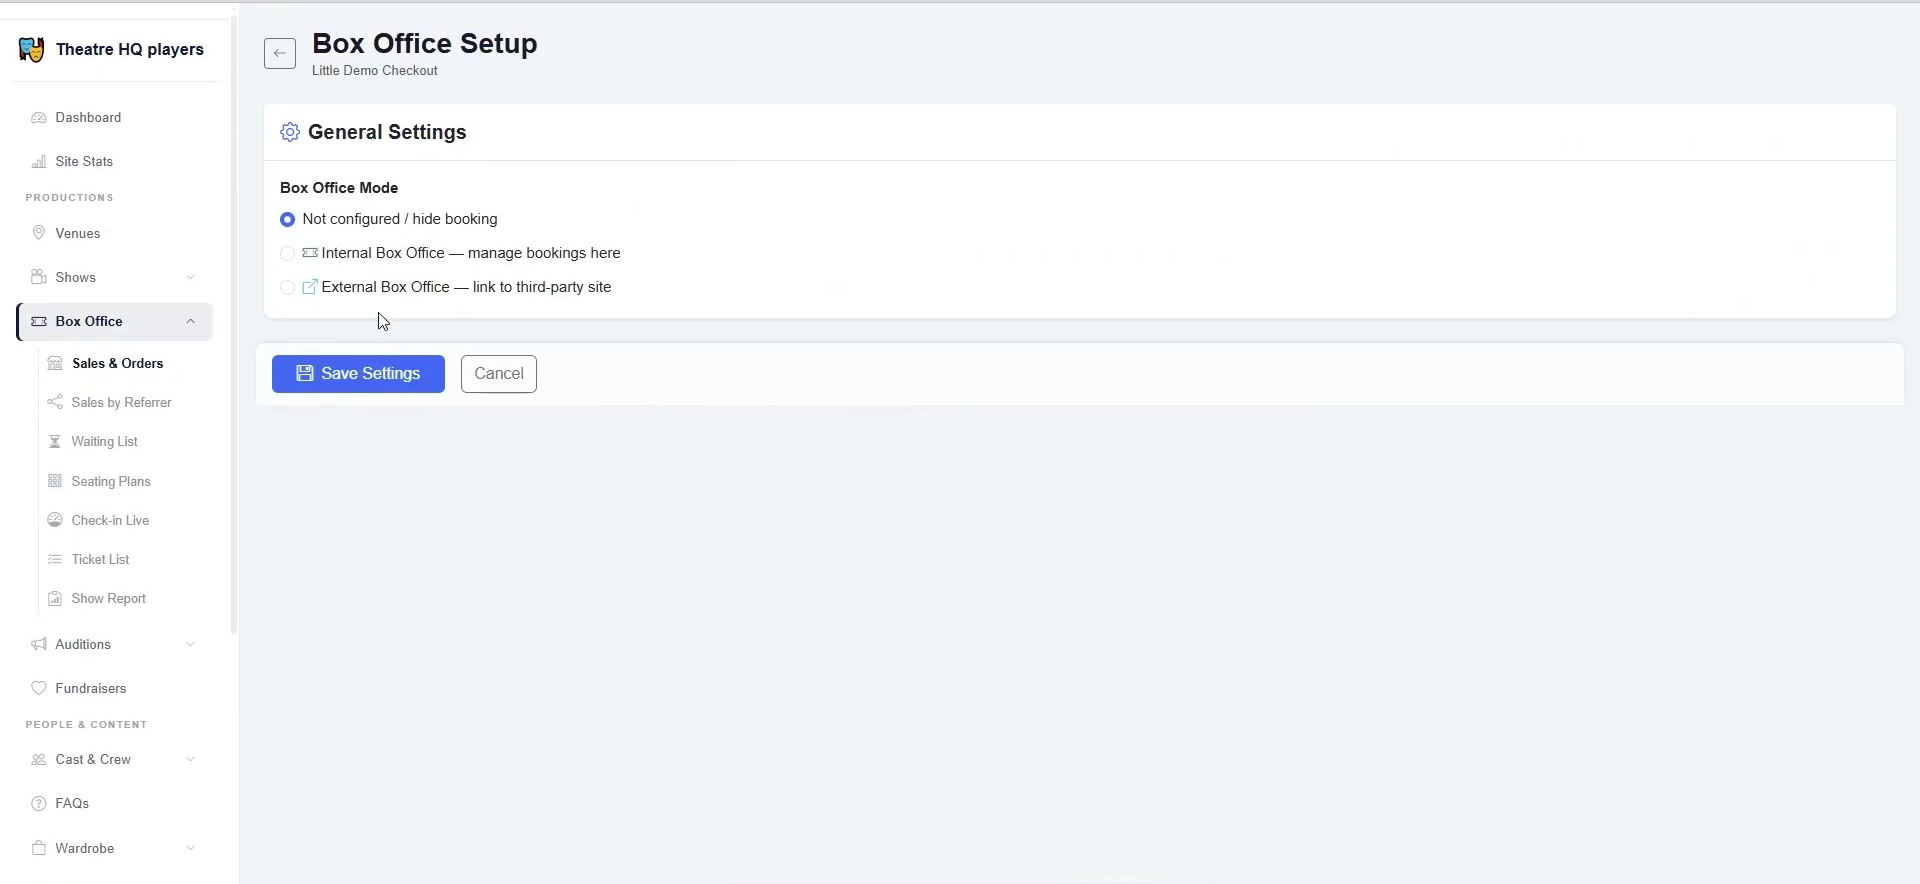
From the show, open the Box Office area and click Set Up Box Office. This takes you to the General Settings page where you choose how the show will sell tickets.
3. Choose a box office mode
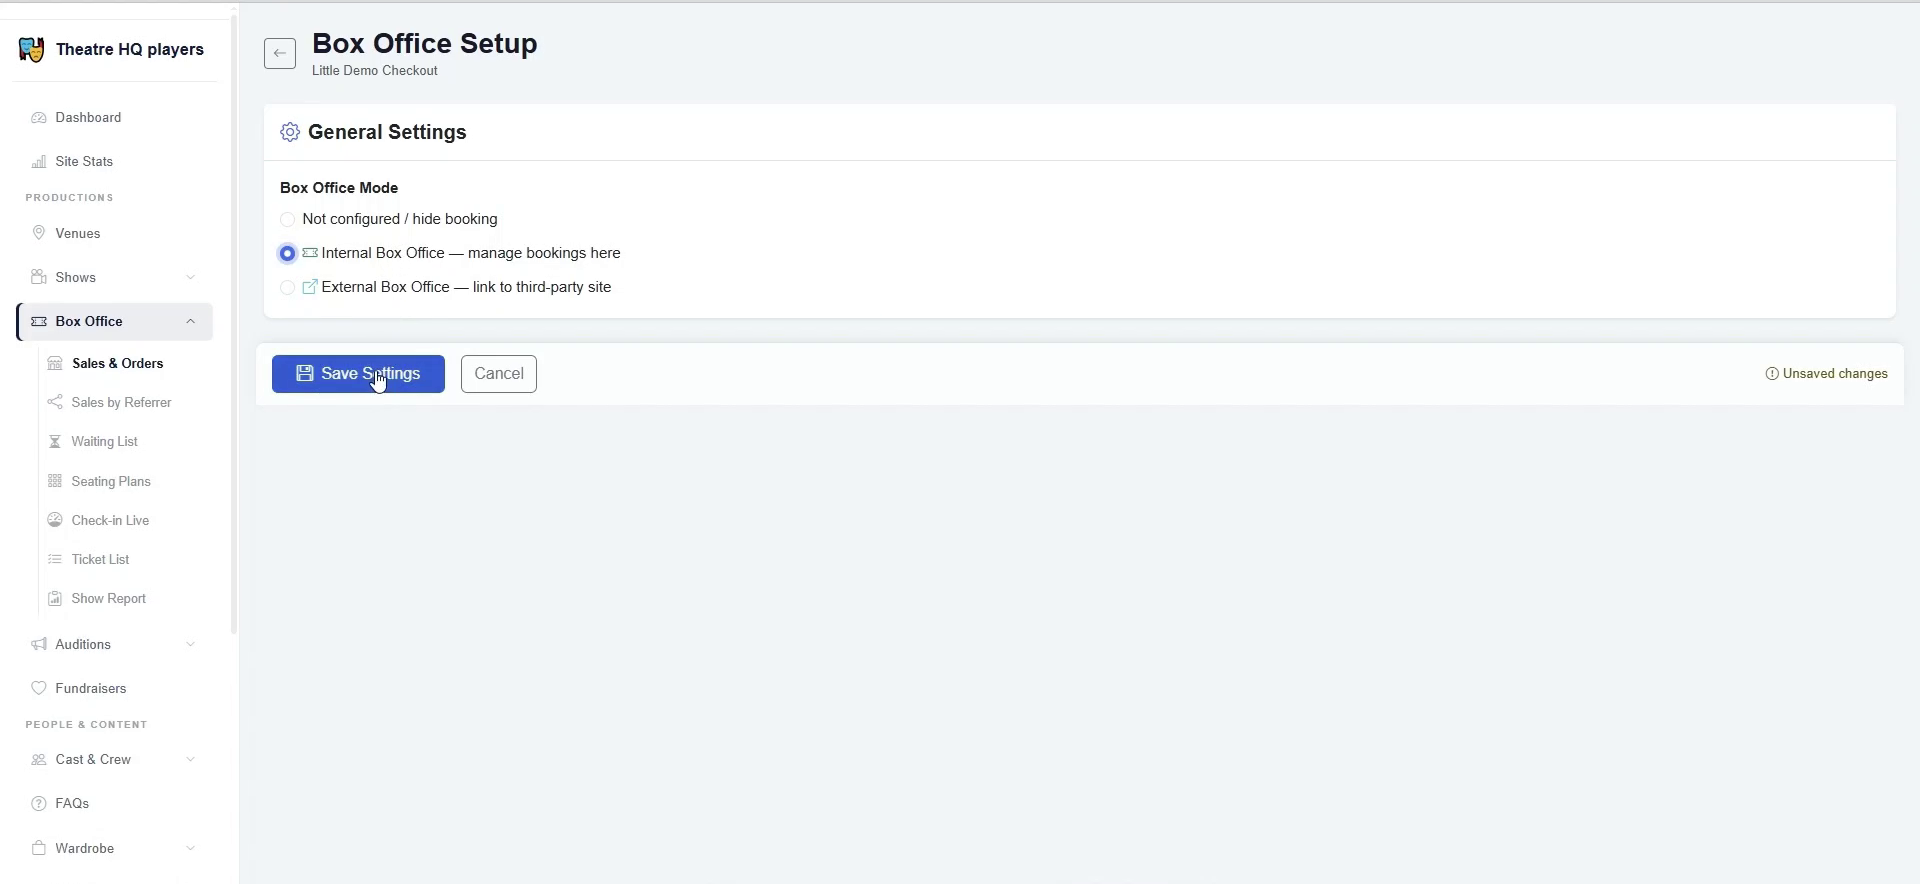
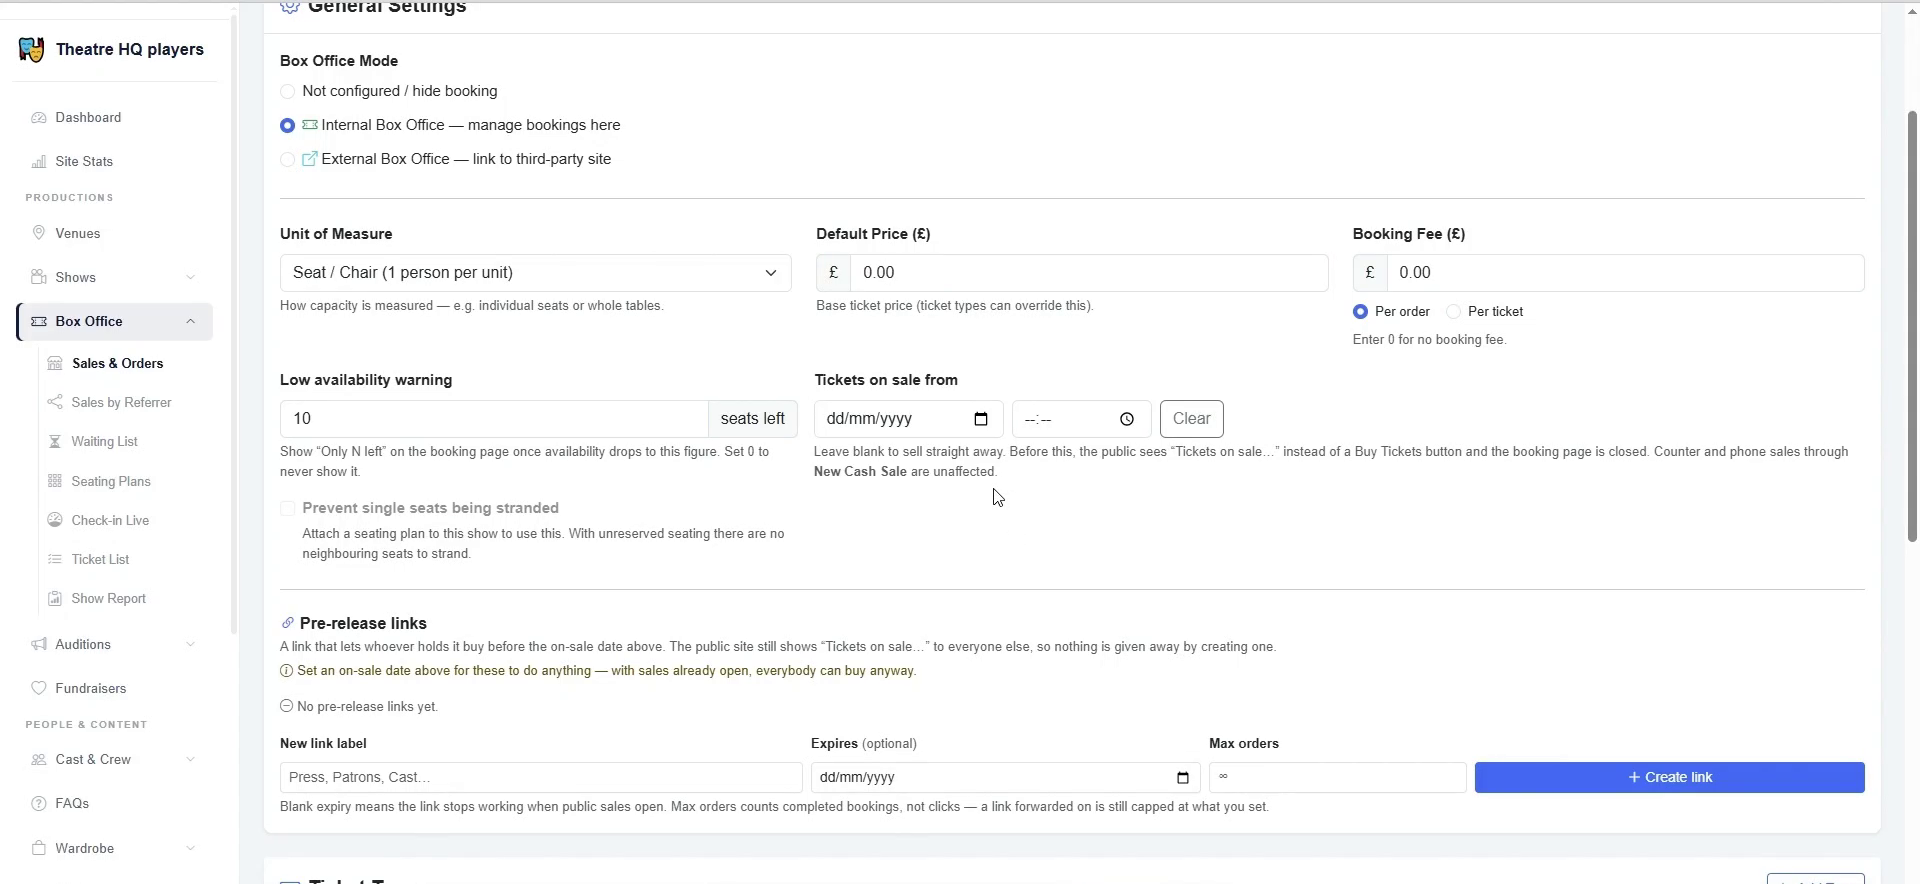
Select Internal Box Office to manage bookings directly in TheatreHQ. Not configured hides booking and is useful for older archive shows, while External Box Office links to a third-party site. Click Save Settings to apply your choice.
4. Set unit of measure and pricing
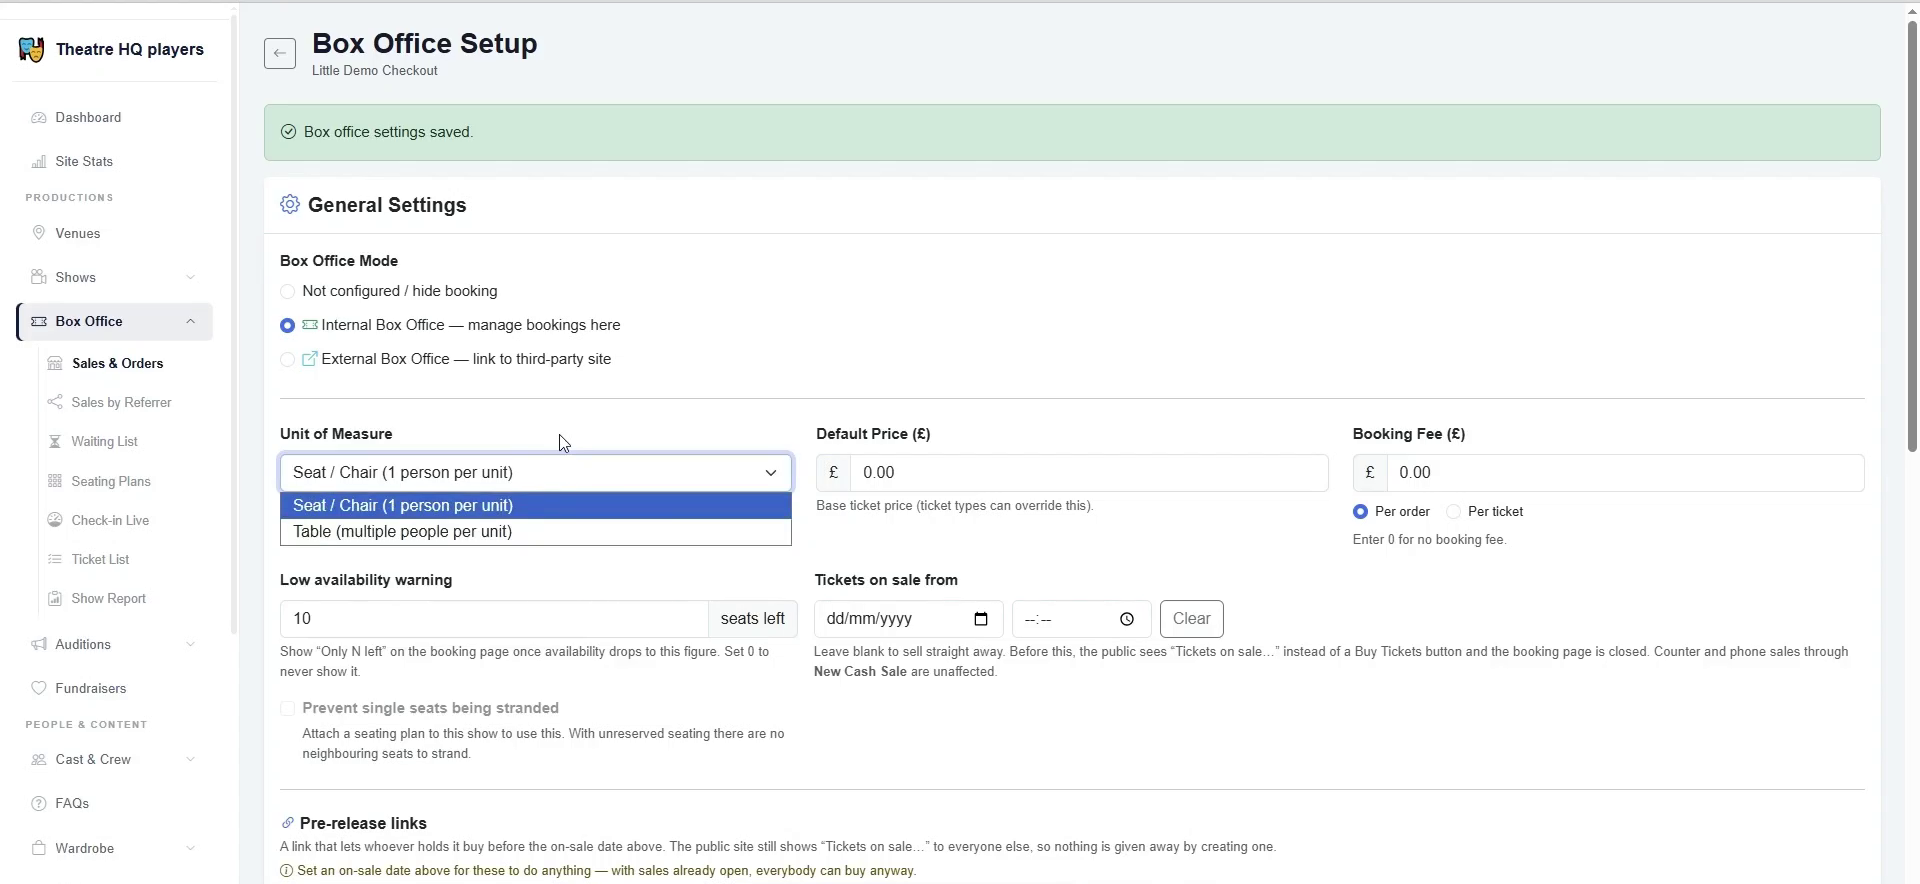
Choose Seat / Chair (1 person per unit) or Table (multiple people per unit) depending on how you sell. Set the Default Price for single ticket sales, and set a Booking Fee; choose Per order or Per ticket so the fee is applied correctly.
5. Set tickets-on-sale from and pre-release links
Use Tickets on sale from to set the public on-sale date. Before that date, the public sees a Tickets on sale message instead of a Buy Tickets button. Create a pre-release link to let a selected group book early before the public date.
6. Add multiple ticket types
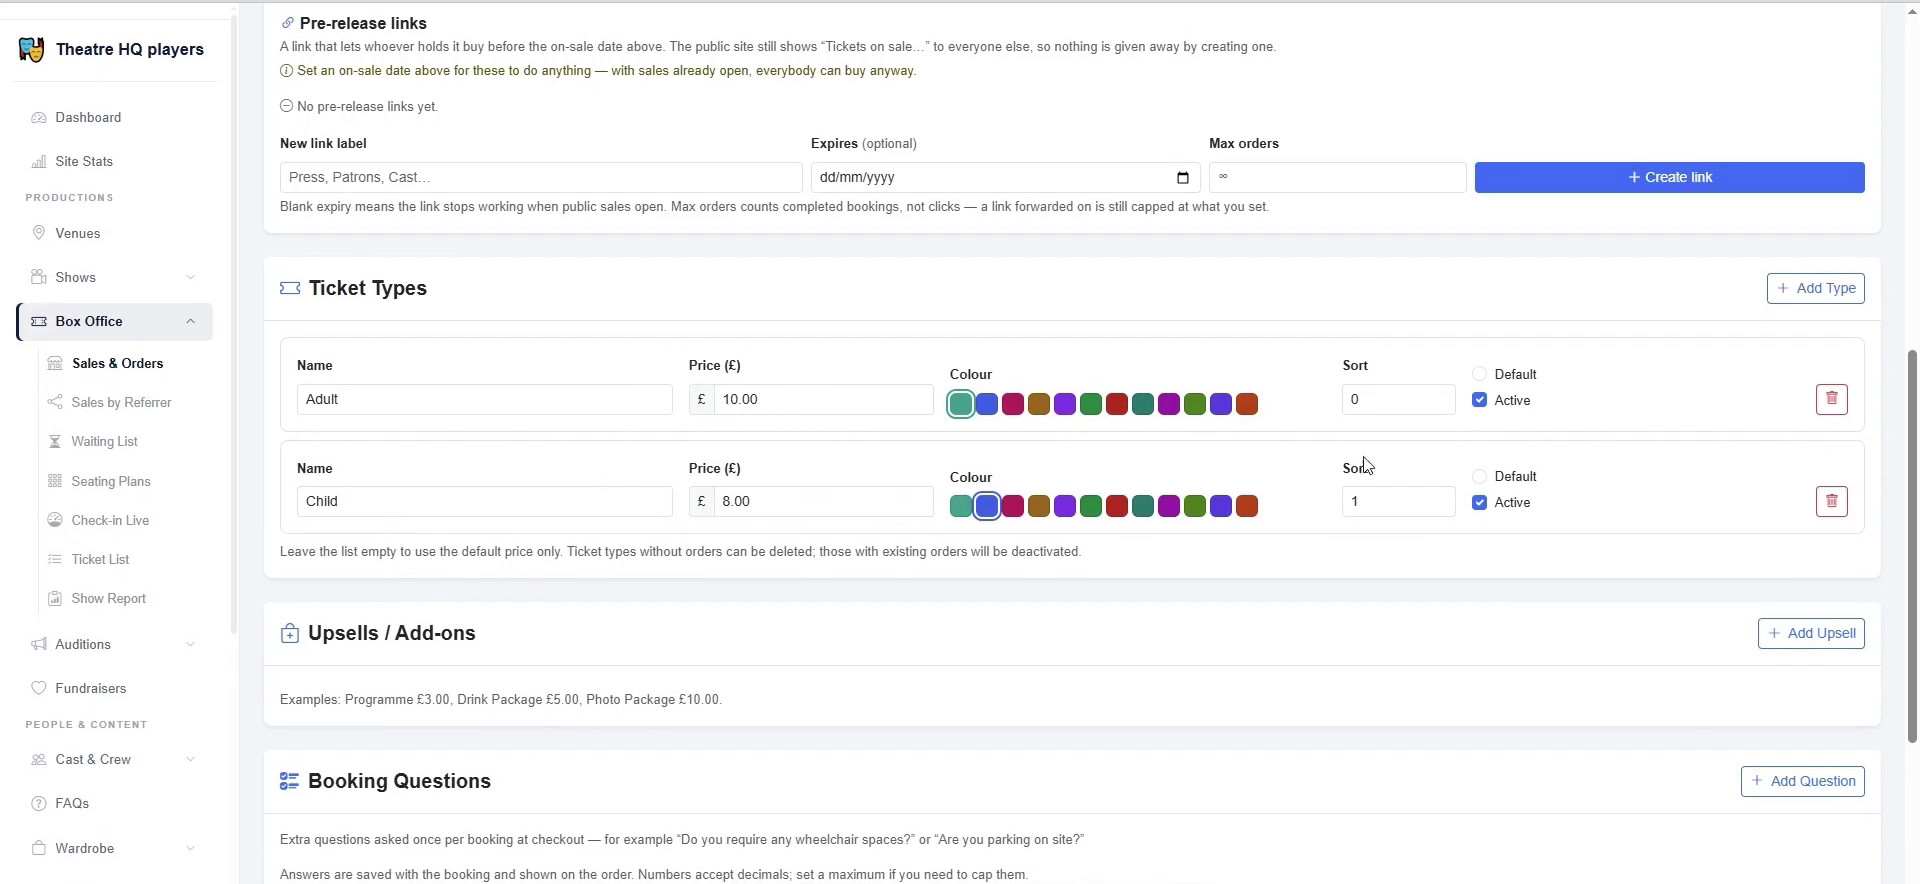
Add multiple ticket types such as Adult and Child instead of relying on one default price. Set each name, price, colour, sort order, and whether it is the default. Leave the list empty if you only sell one ticket type.
7. Add upsells and booking questions
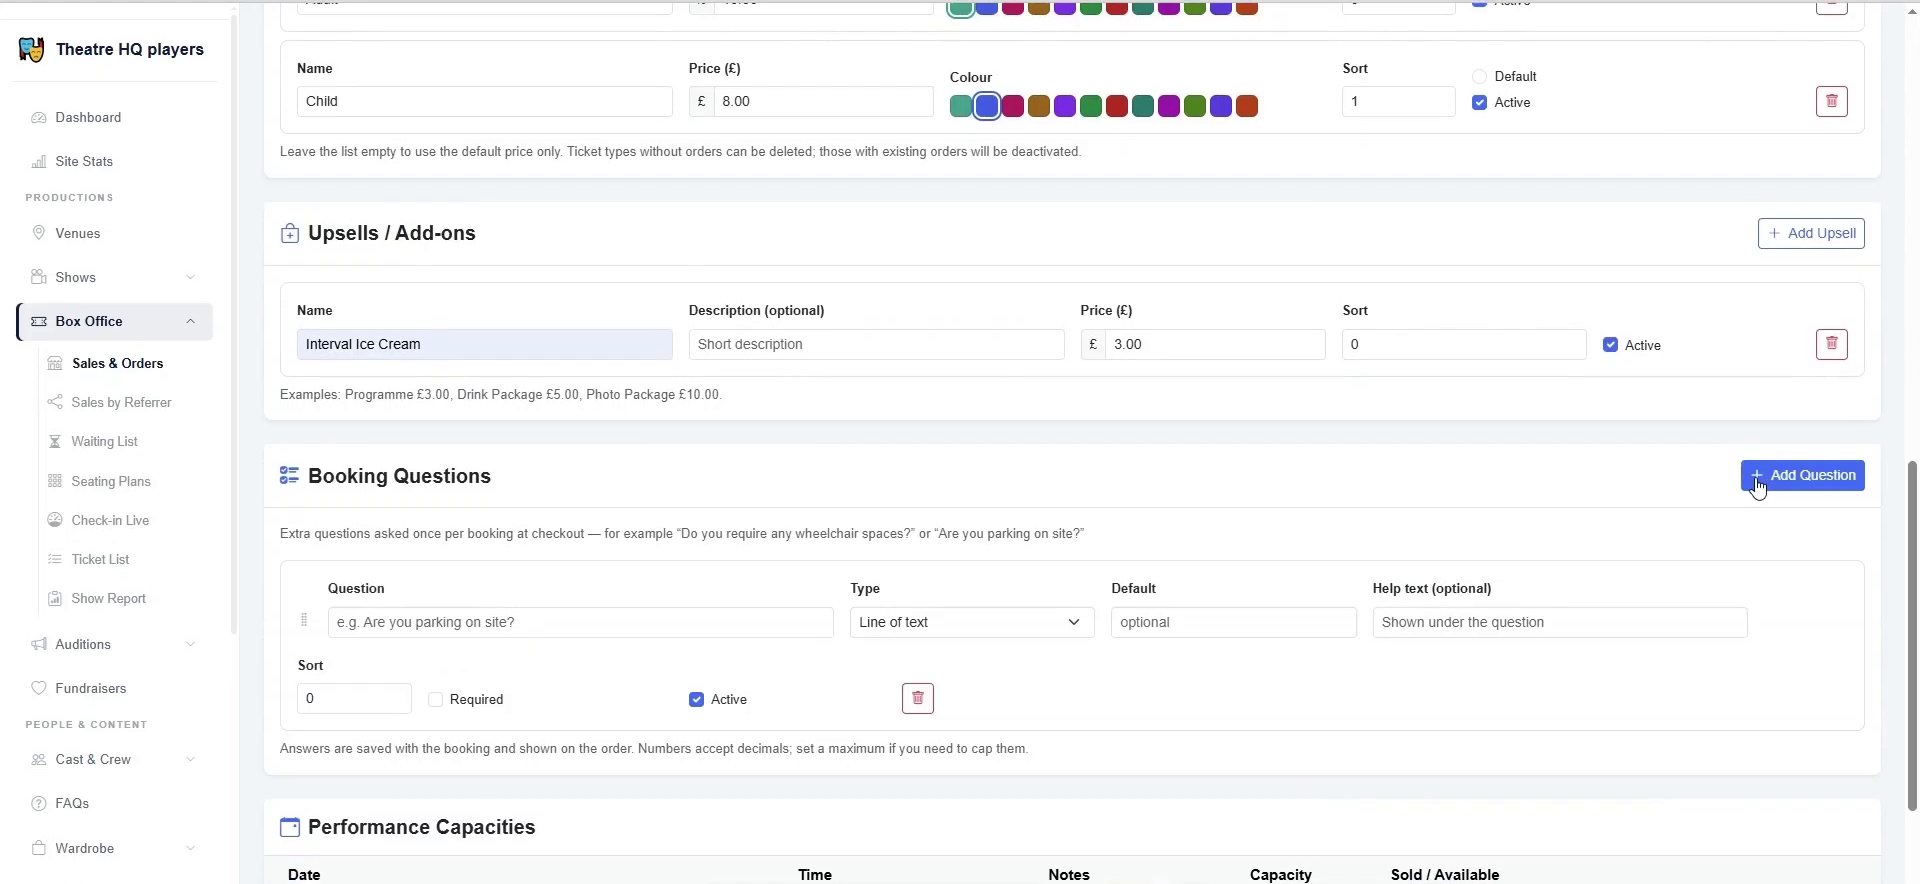
Add Upsells / Add-ons for programmes, ice cream, or other interval items, with a name and price. Add Booking Questions for information you need at checkout, such as parking or access needs, and choose the appropriate Type.
8. Set performance capacities
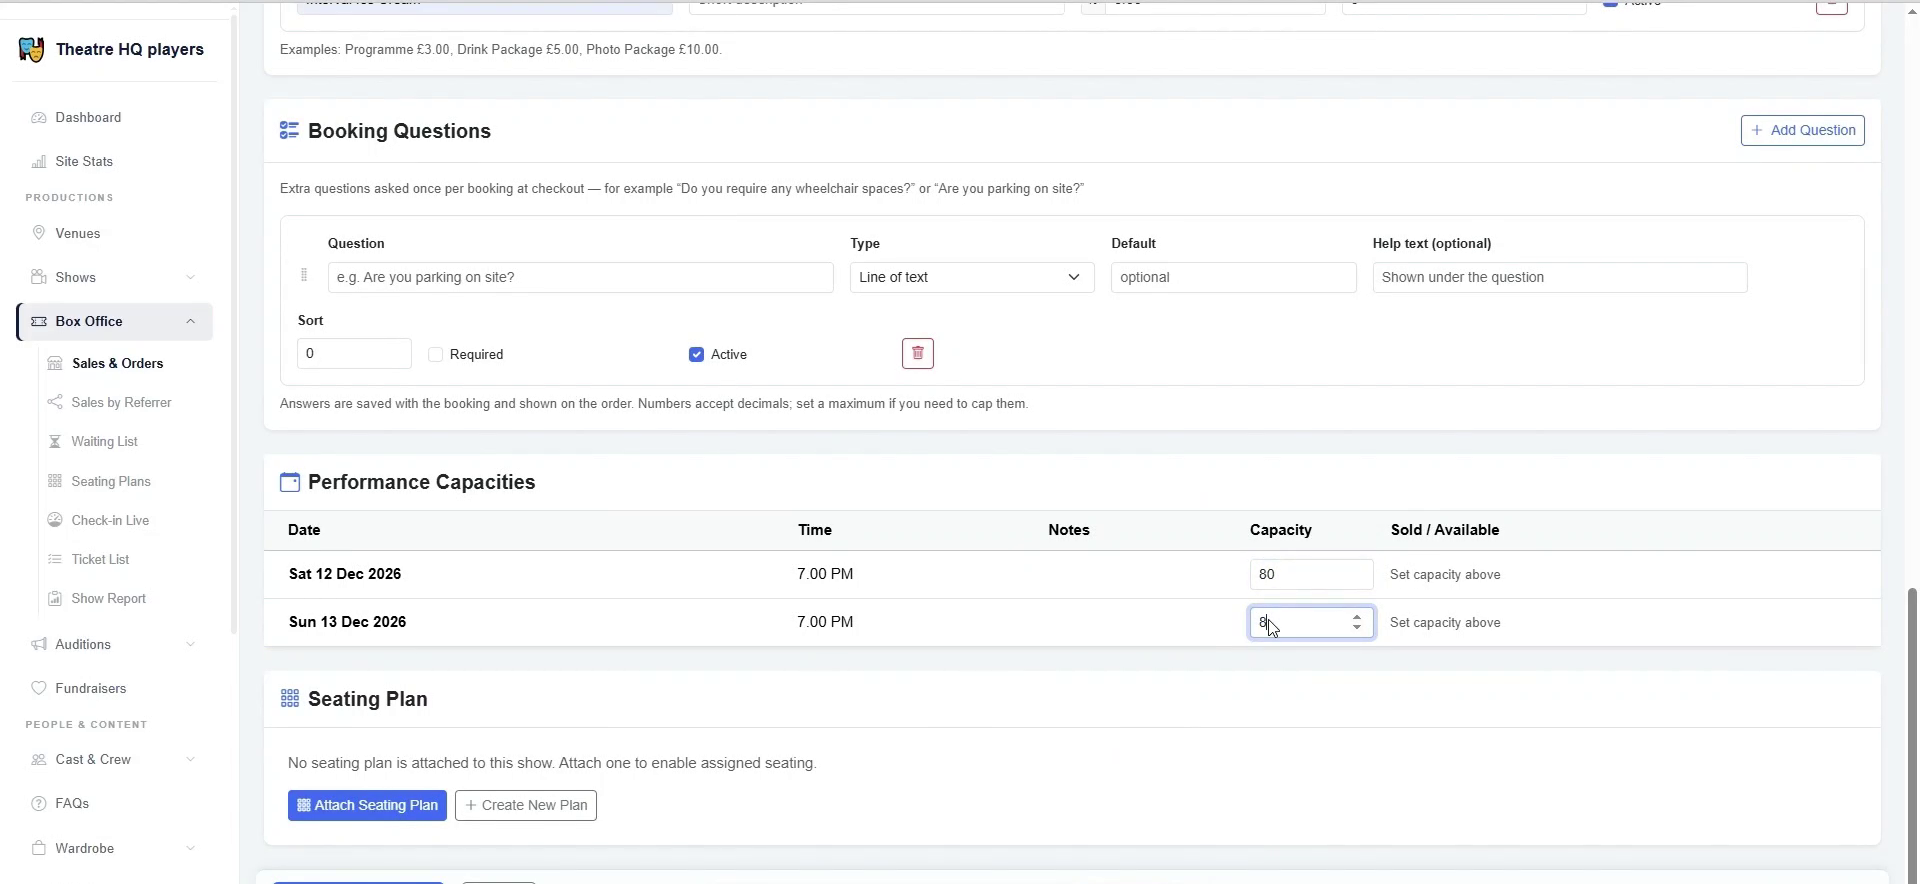
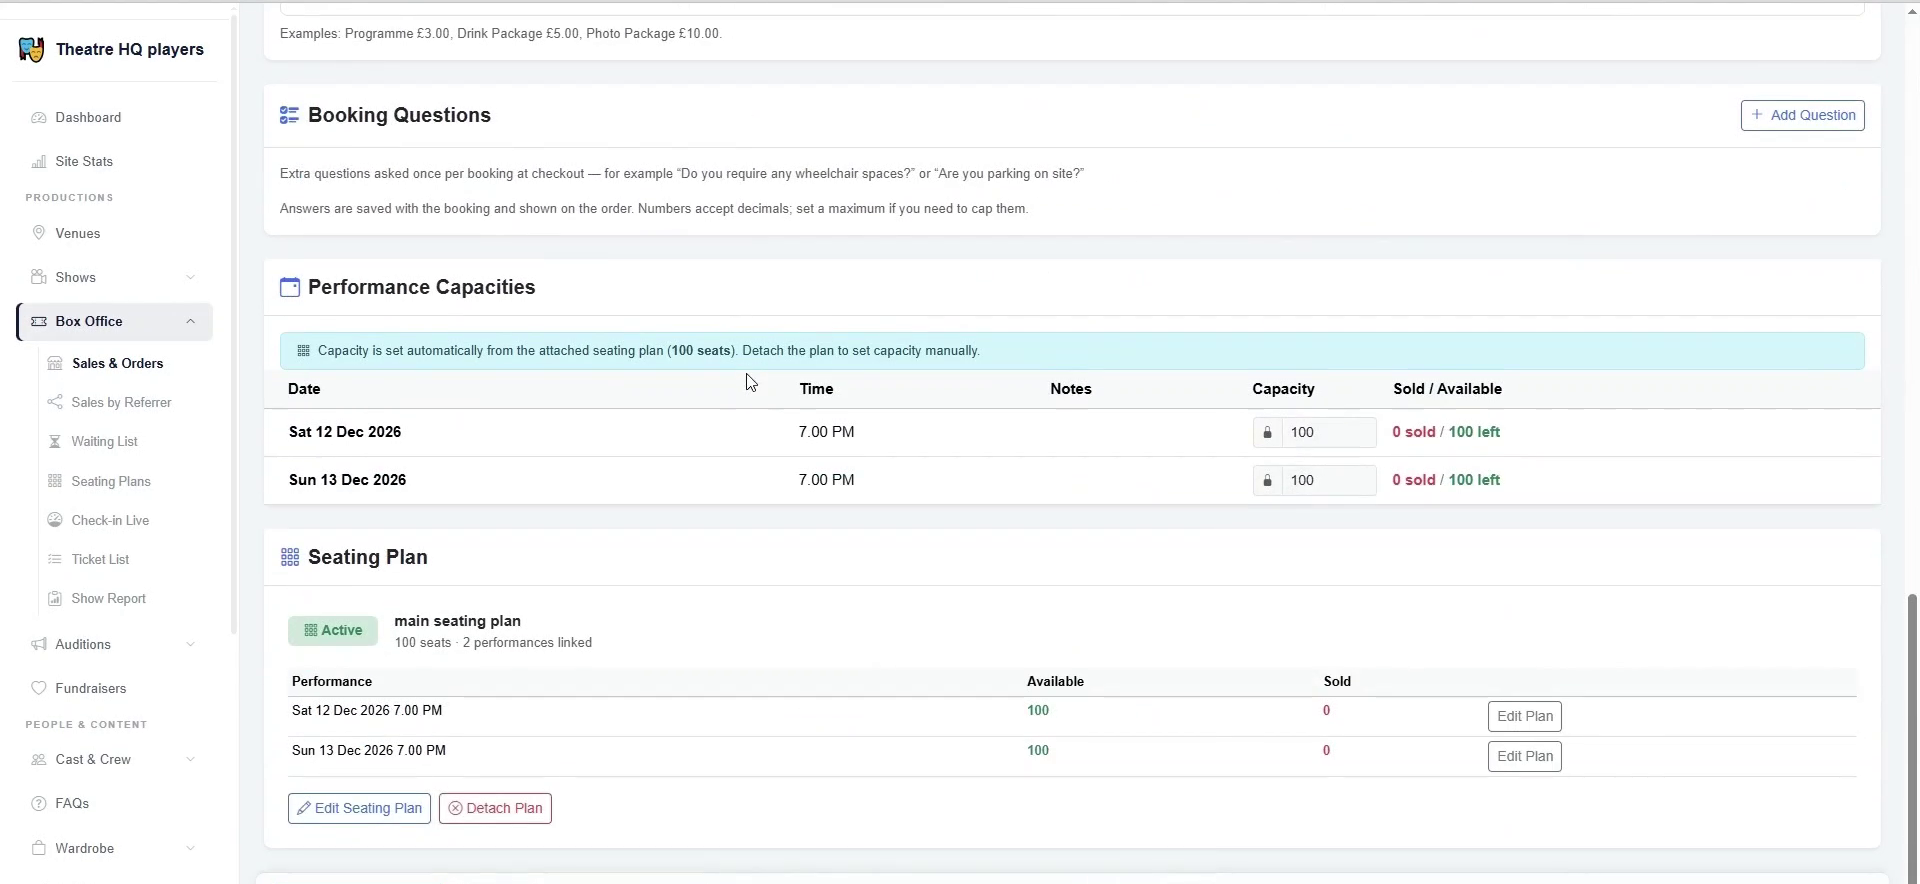
If you are not using a seating plan, set the Capacity for each performance so the system knows how many tickets are available. You can set capacities individually for each date and time.
9. Attach a seating plan to generate inventory
Attach a seating plan and generate inventory to enable allocated seating. The plan's seat count then drives capacity automatically, overriding the manual performance capacities.
10. Set show status for public checkout
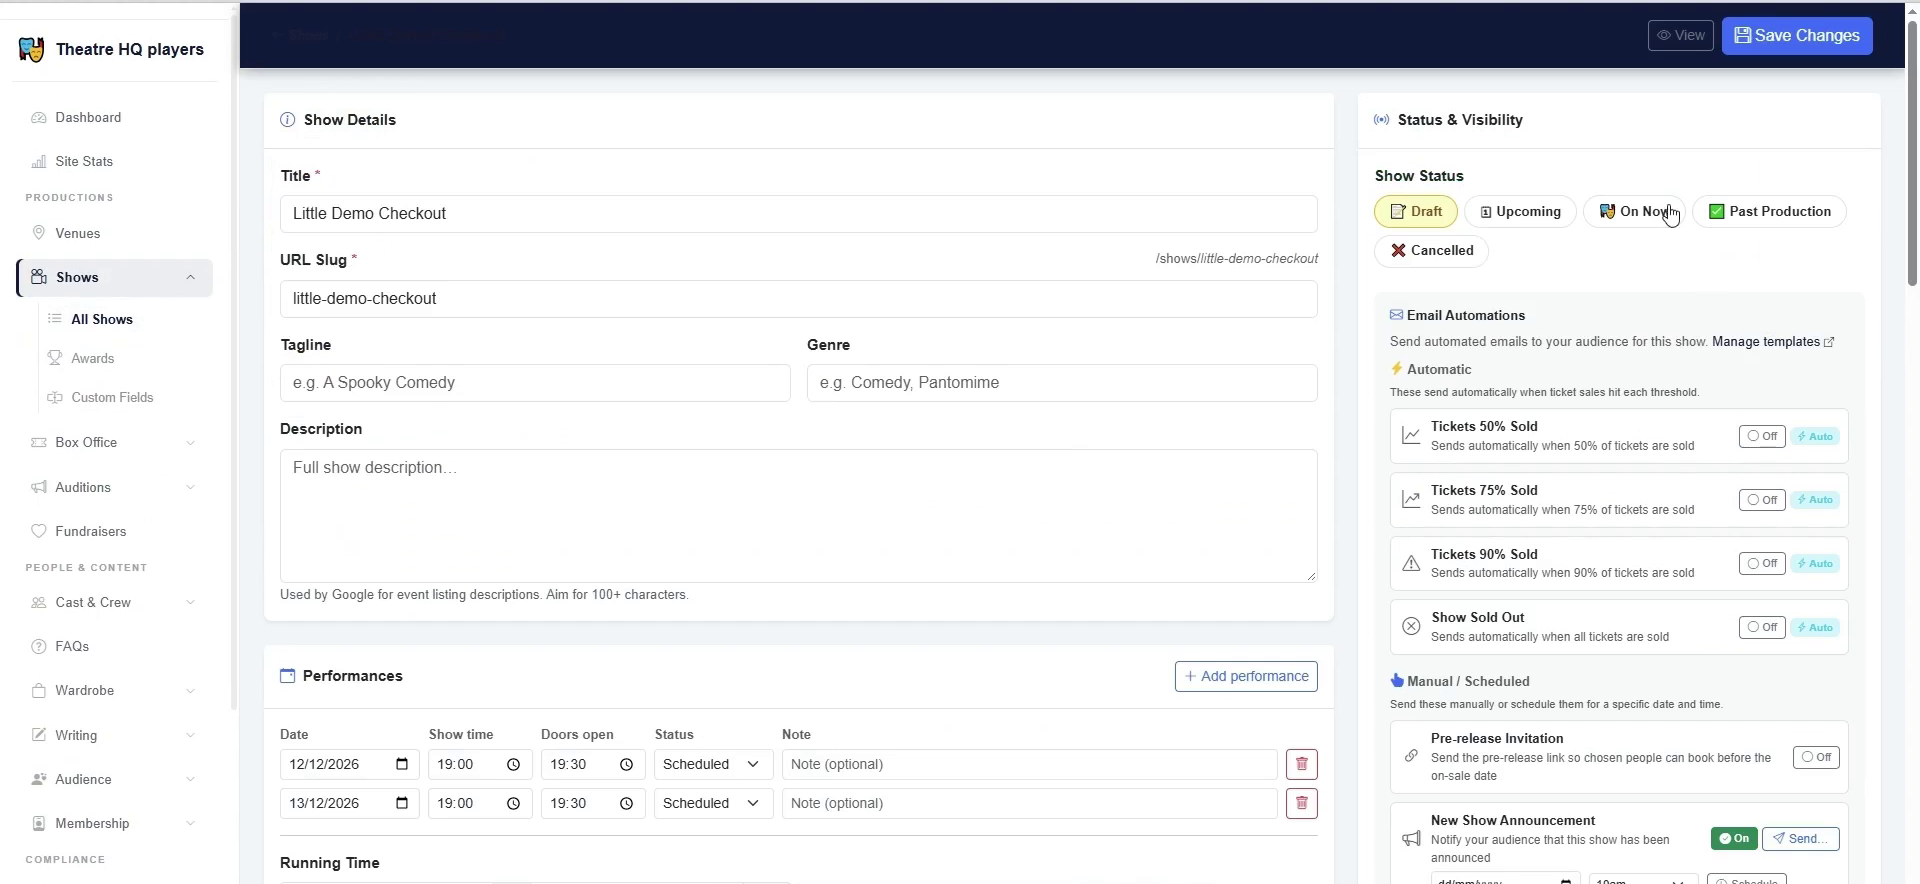
A show must be set to On Now or Upcoming, not Draft, before its checkout appears on the public site. Use Status & Visibility in the show editor to change it.
11. Test the public booking flow
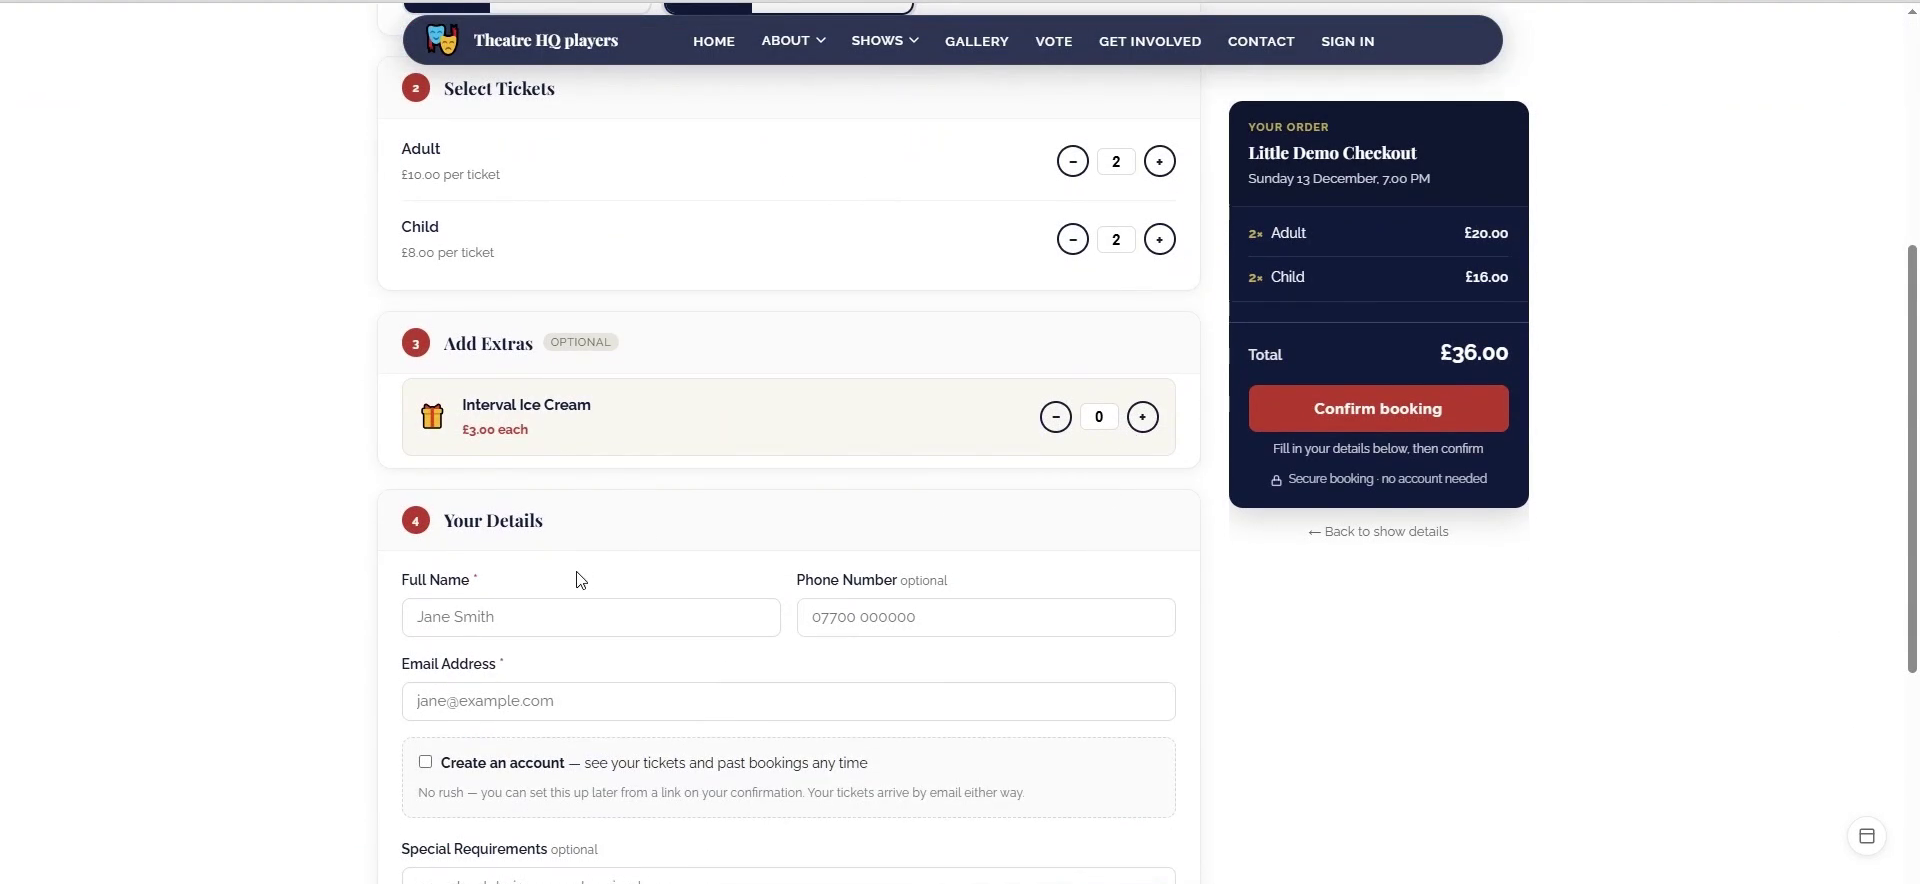
On the public site, click Buy Tickets and choose a performance. Select ticket types and extras, enter customer details, and confirm booking to reach payment.
Save your settings as you go. With performances, pricing, ticket types, upsells, questions, and capacities configured, you can switch the show to On Now or Upcoming and take bookings through the public checkout.