Getting started: your first show on sale
From an empty account to tickets on sale in one sitting: add your show, set up performances, the venue and tickets, choose when booking opens and publish.
This guide takes you from an empty account to tickets on sale in one sitting. The video above shows every step, and the notes below go through the same steps so you can follow along at your own pace. Each step links to a fuller guide if you want more detail.
1. Add your show
Go to Shows in the menu and click Add New Show. Give it a title, a short tagline and a description. The description appears on your website and in Google, so a few sentences about the story and where it's on are worth the effort. Add a poster while you're here, as it's the first thing people see.
There's more on everything this page can do in Adding a show.
2. Add performances and the running time
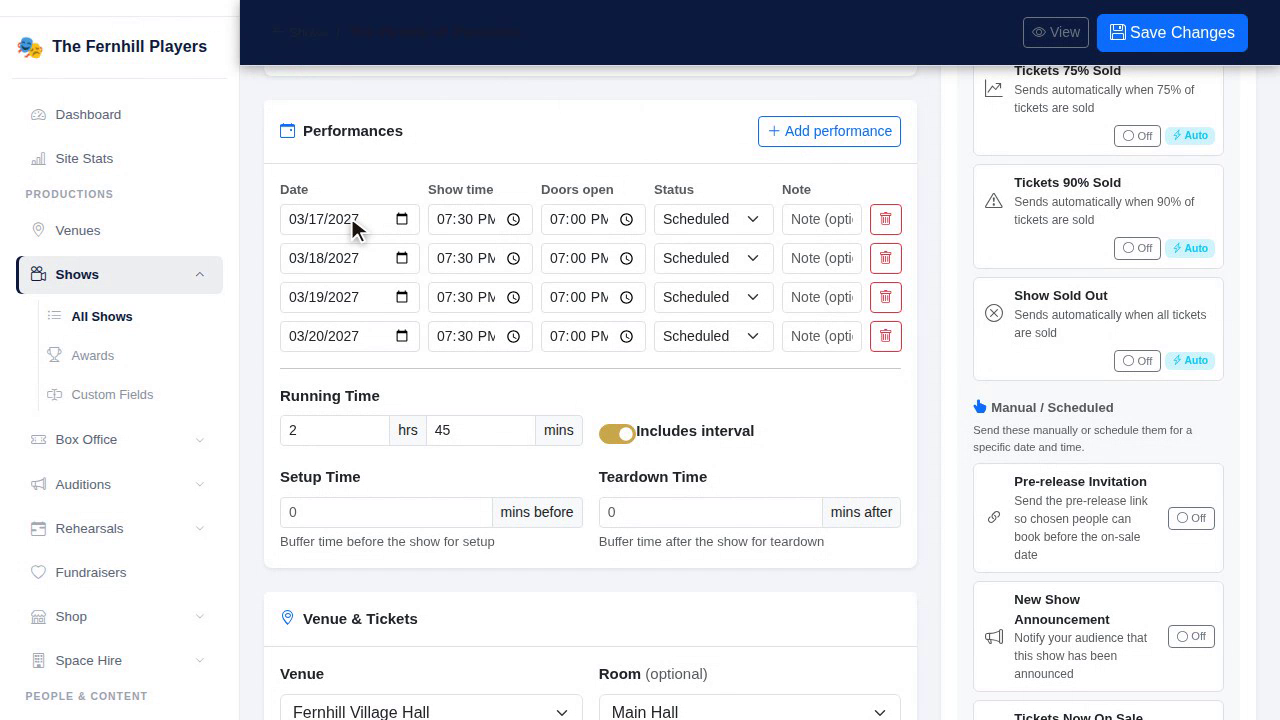
Scroll down to Performances and click Add performance for each night or matinee. Set the date, the show time and when the doors open. Then fill in the Running Time and tick Includes interval if there is one, so your audience knows when to arrange their lift home.
3. Choose the venue
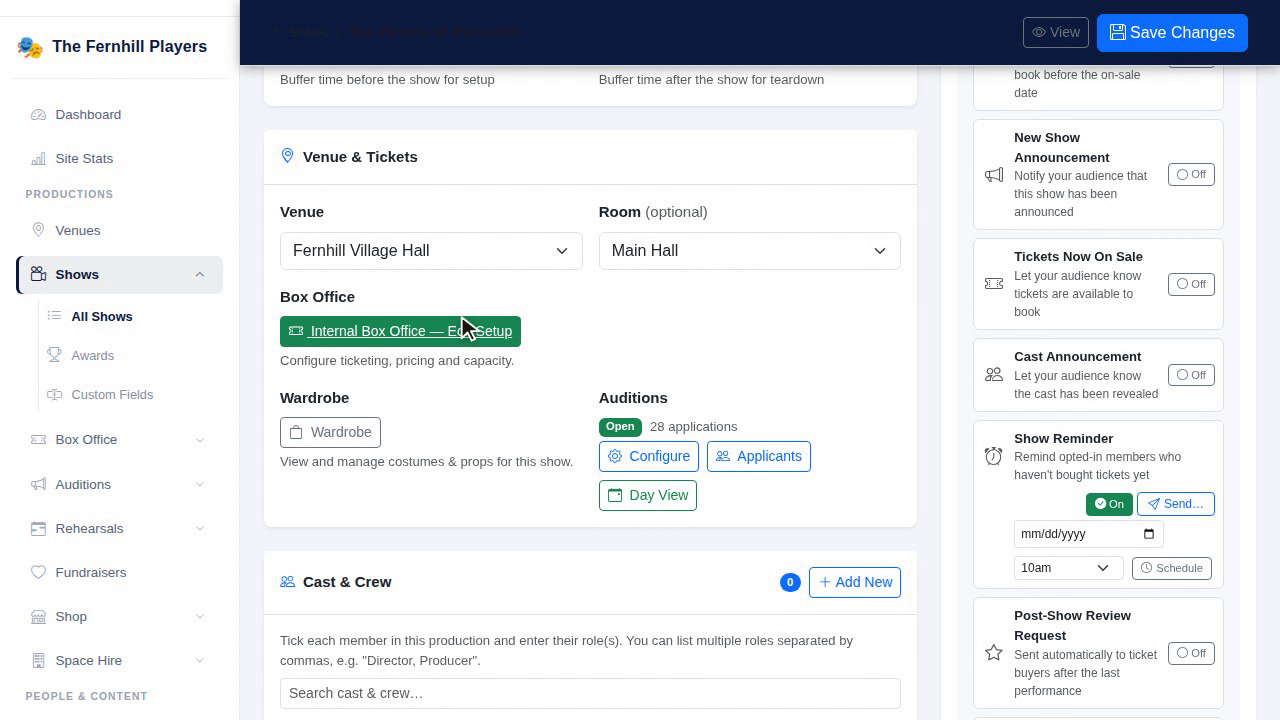
Under Venue & Tickets, pick the venue and, if it has more than one, the room. If your venue isn't listed yet, add it first (see Adding your venues and rooms).
Below that, set the Box Office to Internal Box Office and click Edit Setup to set up your tickets.
4. Set up your tickets
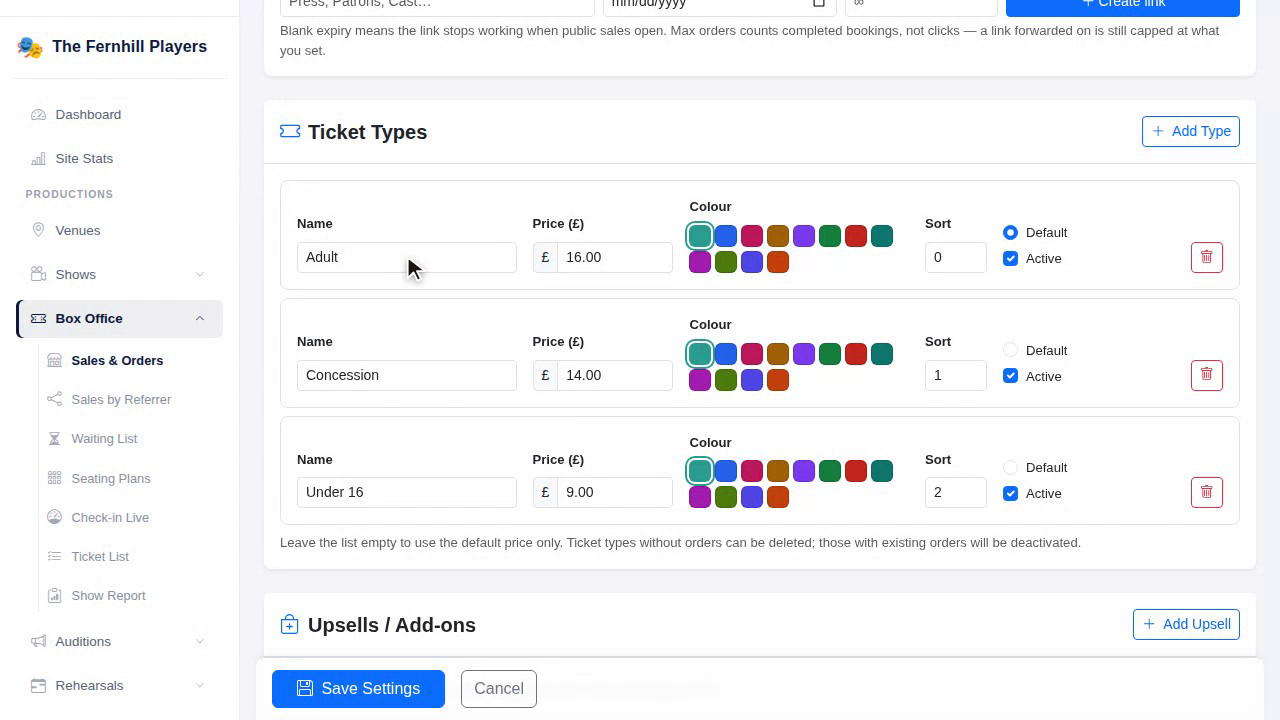
In the box office setup, add your Ticket Types, such as Adult, Concession and Under 16, each with its own price and colour. The colour is how each ticket shows up on your seating plan and reports.
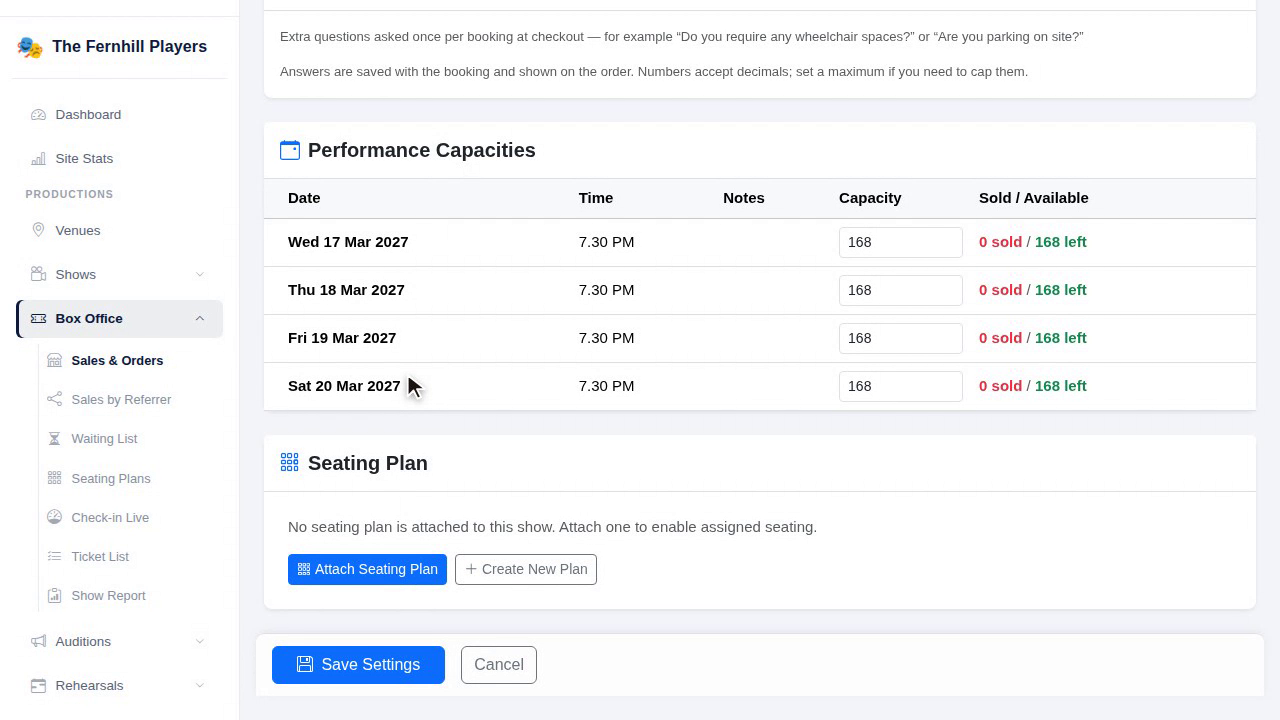
If you sell reserved seats, attach a Seating Plan so people can pick where they sit. You can use one you've already made or click Create New Plan (see Creating a seating plan for your venue). If you sell unreserved seating, skip this and just check the Performance Capacities, which set how many tickets each performance can sell.
5. Choose when tickets go on sale
At the top of the box office setup, under General Settings, set Tickets on sale from to the date and time you want booking to open. Leave it blank to go on sale straight away. You can also add a booking fee here if you charge one. Click Save Settings.
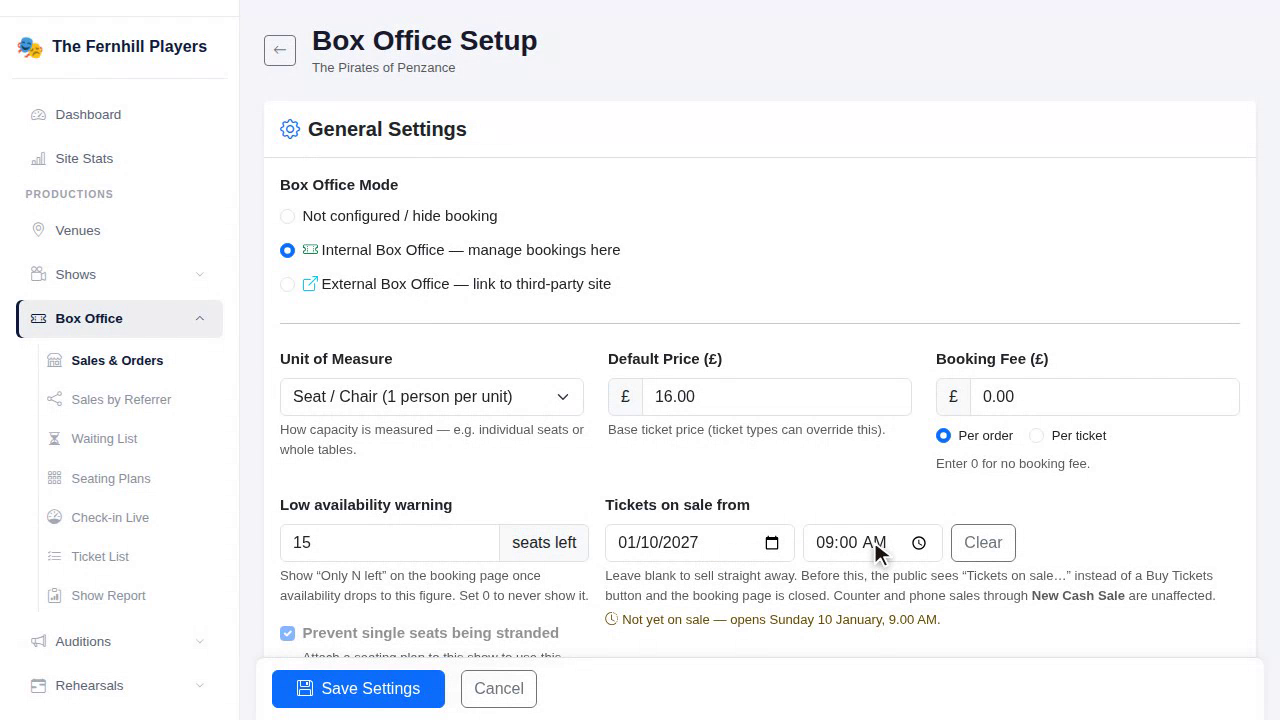
Want your members to book first? See Letting members book first.
6. Publish your show
Back on the show, find Status & Visibility and change the status from Draft to Upcoming, then click Save Changes. Your show now appears on your website.
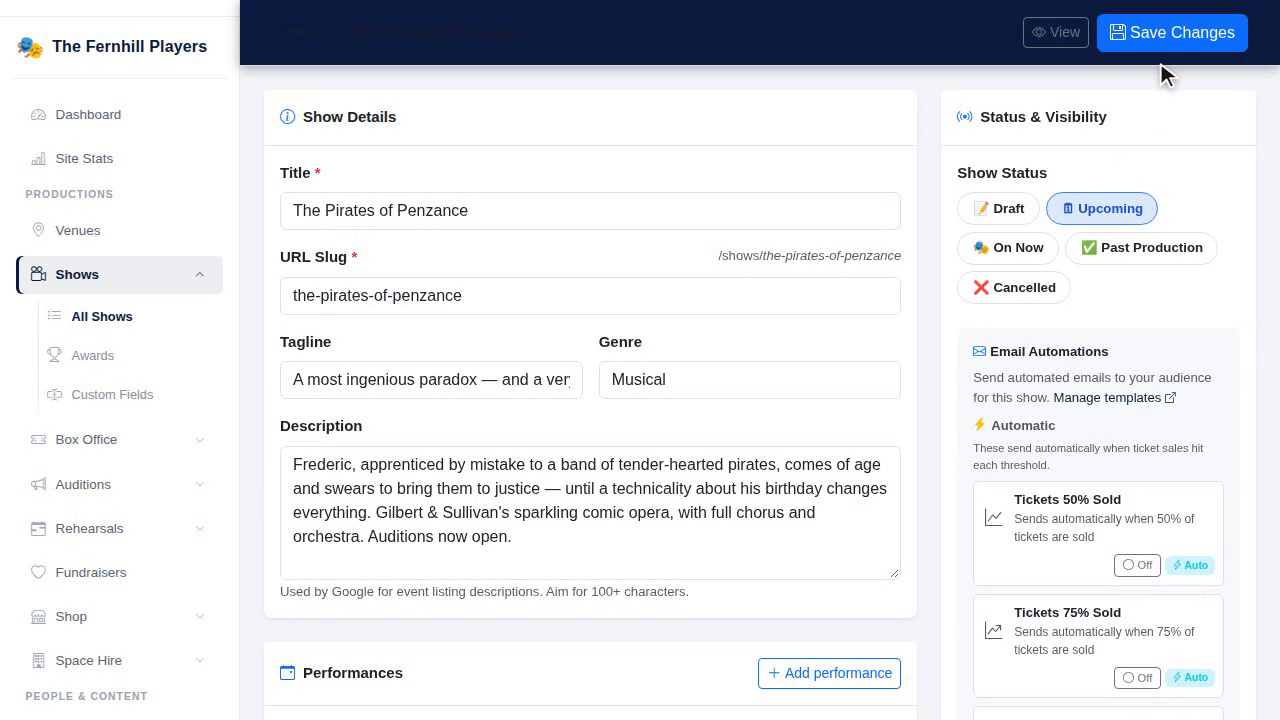
Once the on sale time arrives, the show page has a Buy Tickets button.
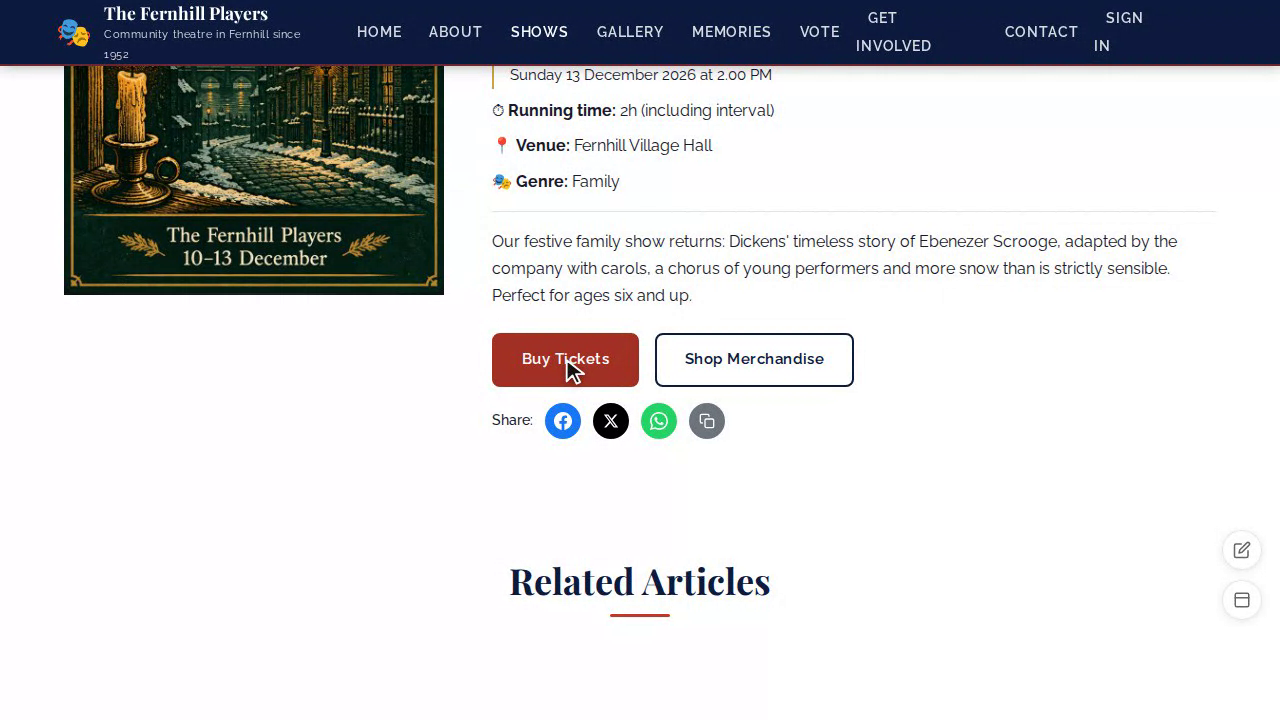
7. See it from your audience's side
Your audience chooses a performance, picks their seats or lets the system pick the best ones, and confirms. They don't need an account. It's worth making a test booking yourself, ideally on a phone. What your audience sees when they book walks through it screen by screen.
8. Watch the orders come in
Every booking appears under Box Office then Sales & Orders, with the customer, performance, number of tickets and total. For the bigger picture, see Checking how ticket sales are going.
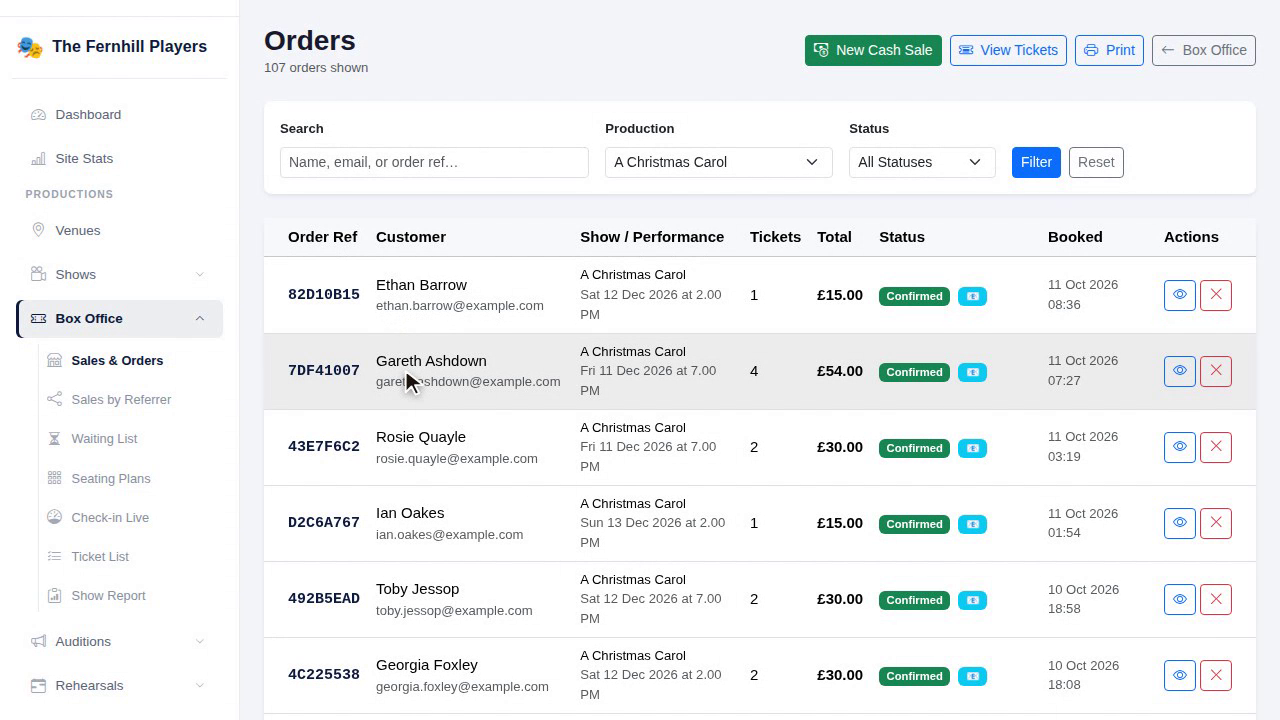
Before you announce it
- Make sure you've connected a way to take payments (see Connecting your payment providers).
- Make a test booking and check the confirmation email arrives.
- Check the running time, venue and access information are on the show page.
- Share the show page link on social media and in your next email campaign.
Tip: on the night, you can sell on the door and scan tickets from a phone. See Selling tickets on the door and Checking tickets at the door.